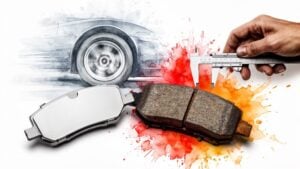

So, you just had new brake pads installed. That crisp, responsive feel is a great start, but the job isn't quite finished yet. To get the absolute best performance and life out of them, you need to "bed them in." It's a simple process that makes a world of difference in your stopping power, especially on the busy roads of Haltom City.
Why Bedding Your Brakes Is a Non-Negotiable Step for Haltom City Driving
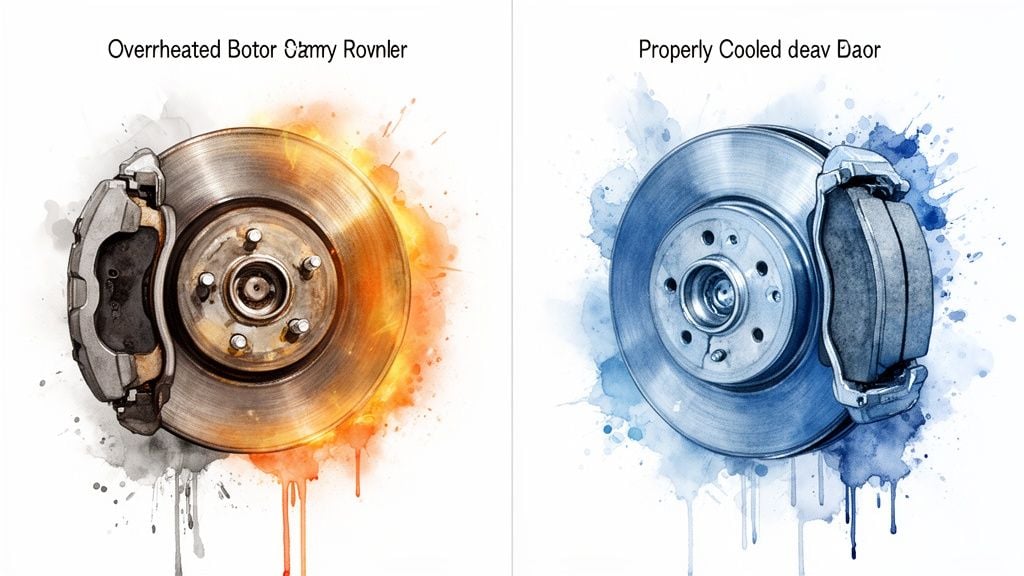
Right out of the box, your new brake pads rely on what we call abrasive friction. Think of it as raw grinding—the pad material is literally scraping against the bare metal of the rotor to slow you down. While it works, it's not very efficient and creates a ton of excess heat that can cause serious problems down the line.
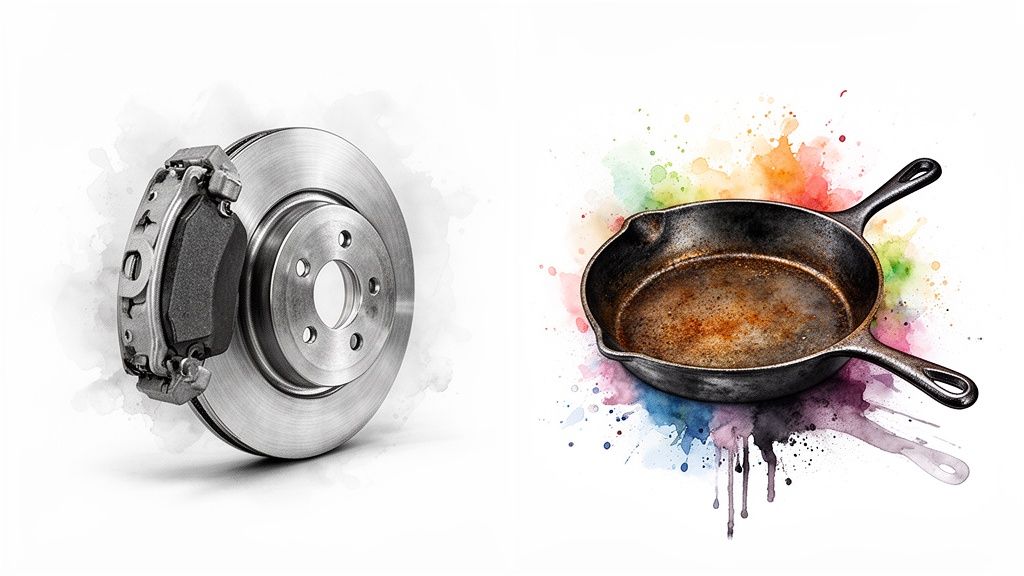
The best way I can explain the solution is to compare it to seasoning a new cast-iron skillet. You wouldn't just throw a steak on a brand-new pan, right? You season it first to create that perfect non-stick surface. Bedding-in does the same thing for your brakes.
The Magic of Adherent Friction
The goal of the bedding-in process is to move from that rough abrasive friction to a much smoother, more powerful method called adherent friction.
Through a series of controlled, deliberate stops, you heat up the new pads and rotors just enough to transfer a micro-thin, even layer of pad material directly onto the rotor's surface. Once that transfer layer is established, the pads aren't grinding anymore. Instead, they’re gripping—the pad material is bonding with the pad material already on the rotor.
This simple change has some massive benefits, especially for anyone navigating the busy streets of Haltom City:
- Serious Stopping Power: Properly bedded brakes are more responsive and have a much better "bite."
- Quiet Operation: That even transfer layer is your best defense against the vibrations that cause annoying brake squeal.
- Longer Brake Life: Adherent friction is far less wearing on your pads and rotors, meaning you get more miles for your money. For more on this, check out our tips on the typical life of brake pads.
From Good Brakes to Great Brakes
Taking the time to bed in your brakes isn't just a suggestion from manufacturers; it's a critical step for performance and safety. A properly bedded set of brakes can stop your vehicle up to 20 percent more effectively. This isn't just a number—it’s the difference between a close call and an accident on Haltom City roads.
That boost comes directly from creating that ideal transfer layer. Without it, you’re just creating excessive heat and grinding down your brand-new components.
Think about it. When you're dealing with the constant stop-and-go traffic on Denton Highway or have to make a sudden stop near North Tarrant Park, that extra stopping power is non-negotiable. Taking just 15 minutes to do this right ensures your brakes are there for you when it counts.
Your Pre-Bedding Safety and Location Checklist
Alright, before you even think about starting the engine, let's talk about where you're going to do this. I can't stress this enough: the single most important part of this process is picking the right location. You'll be doing a series of hard, controlled stops, and you absolutely cannot do this in regular Haltom City traffic.
You need a long, open stretch of road or a massive, deserted parking lot where you have zero chance of interacting with other cars or people.
Finding the Right Spot in Haltom City
Let's be honest, finding a perfect, empty stretch of road in a place like Haltom City can be tricky. You have to get a little creative.
Think about large industrial parks on a Sunday or big church parking lots on a Tuesday afternoon. Even some of the quieter rural roads just outside the Haltom City limits can work perfectly. The goal is to find a place where you can comfortably get up to 50-60 mph and then brake hard without anyone being behind you.
Here’s a little advice we give our Haltom City customers at the shop: timing is everything. Try going out early on a weekend morning or later in the evening when the roads are dead. If you can, bring a friend to ride along and act as a spotter. It makes a world of difference.
Before you put the car in drive, just take 30 seconds for one last look. A quick walk-around to check that the wheels are secure and the new brake hardware looks right is time well spent. Trust me, you want to be sure everything is buttoned up tight.
Your Safety and Location Checklist
When you're performing the bedding sequence, your focus needs to be 100% on your driving. Distractions are the enemy here.
Run through this mental checklist before you start your first run:
- Zero Traffic: The road ahead and behind must be completely clear. You'll be braking suddenly, and the last thing you want is to surprise another driver in Haltom City.
- Good Visibility: Don't try this in the rain, fog, or in a poorly lit area at night. A clear, dry day is always your best bet.
- No Obstacles: Do a slow pass of the area first. Look for pedestrians, cyclists, potholes, or anything else that could become a hazard.
- Final Inspection: Give your work one last check. Make sure the pads and rotors were installed correctly. For a step-by-step walkthrough, you can learn more about how to inspect brake rotors in our detailed guide.
Once you’ve found a safe spot and given everything the all-clear, you’re ready to get started.
A Step-by-Step Guide to Bedding In Your Brakes
Alright, you've found a safe, open stretch of road away from the traffic of Haltom City. Now it's time for the main event: the bedding-in procedure itself. We're going to methodically heat and cool the brakes to create that perfect transfer layer we discussed. Think of it as a three-part process: a warm-up, the heavy lifting, and a final cool-down.
Before you start, a quick heads-up: things are about to get a little smelly. You'll likely notice a distinct burning odor as the resins and binding agents in the new pads cure. Don't panic! This is a completely normal sign that you're doing it right.
This image below quickly summarizes the prep work you should have already done.
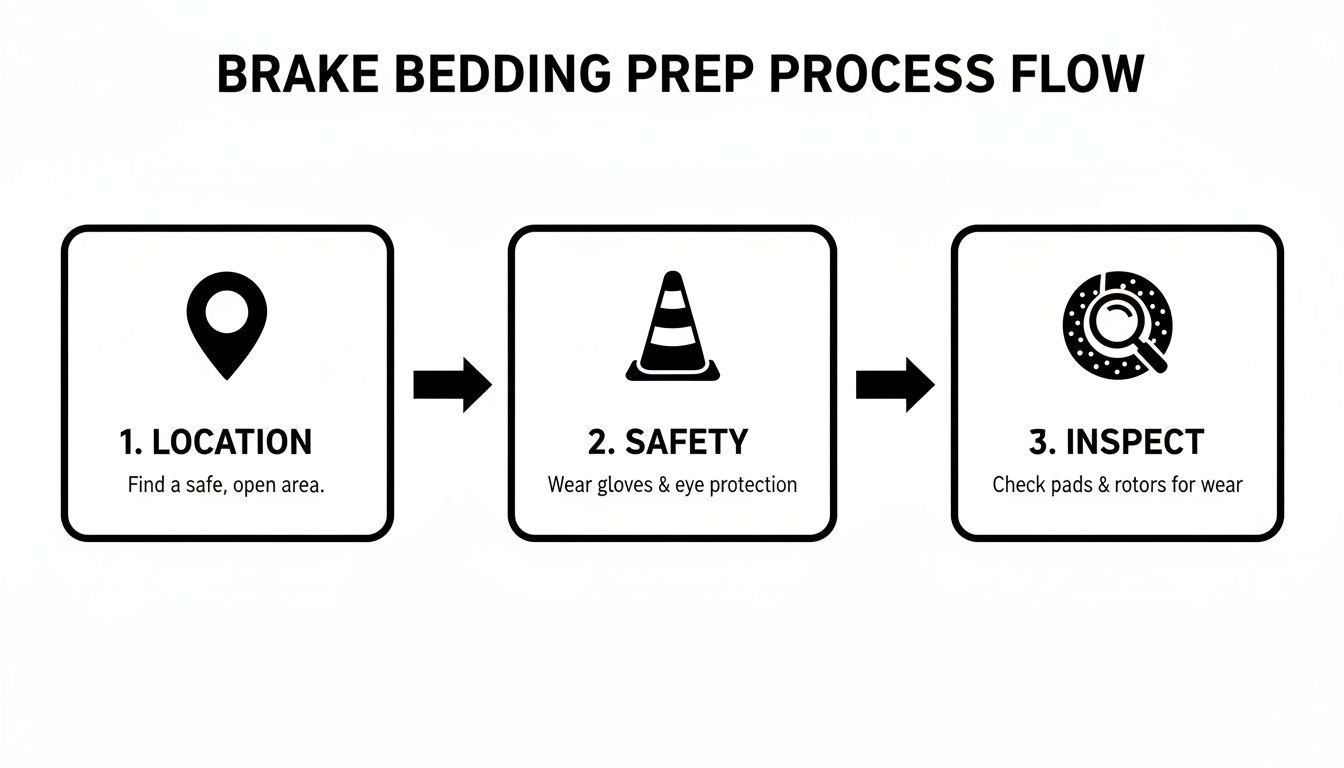
As you can see, it's all about finding the right spot, ensuring your own safety, and giving the new parts a final once-over before you start.
Here's a quick-reference table for the process we're about to walk through. It's a good idea to review this first so you know the sequence of events.
Brake Bedding-In Procedure At-a-Glance
| Phase | Speed Range | Braking Pressure | Repetitions |
|---|---|---|---|
| 1. Warm-Up | Accelerate to 40 mph | Light to moderate | 3-4 times |
| 2. Main Event | Accelerate to 60 mph | Firm and aggressive | 8-10 times |
| 3. Cool-Down | Cruise at 40-50 mph | Minimal to none | 5-10 minutes |
Think of this table as your cheat sheet. Now, let’s break down what to do in each phase.
First, The Gentle Warm-Up
The goal here isn't to stop on a dime. It's to ease your new pads and rotors into the job by gradually introducing some heat. This prepares them for the much more intense braking cycles to come.
You’ll want to perform a series of 3 to 4 gentle stops.
- Start by accelerating to a moderate speed, around 40 mph.
- Then, apply light and steady pressure on the brake pedal to slow down to about 20 mph. Don't mash the pedal.
- Imagine you're smoothly approaching a Haltom City stoplight that just turned red, with plenty of room to slow down. That's the feeling you're going for.
After each of these gentle stops, cruise for about 30 seconds to let some air circulate before you repeat the cycle.
Next, Building the Friction Layer
Now we get to the heart of the matter. In this phase, we're going to use friction to generate serious heat, which is what melts a micro-thin, even layer of pad material onto the face of the rotors.
Expert Insight: The single biggest mistake people make here is coming to a complete stop. If you stop the car while the rotors are glowing hot, the pads will "imprint" themselves onto the rotor, leaving an uneven deposit. This is what causes that annoying shudder or vibration you feel in the pedal later on. Whatever you do, keep the wheels rolling.
To get started, accelerate up to about 60 mph. Then, hit the brakes firmly and aggressively to scrub speed off quickly, slowing down to around 15-20 mph. As soon as you hit that lower speed, get back on the gas and accelerate right back up to 60 mph to do it all over again.
You need to repeat this aggressive cycle 8 to 10 times in a row. The key is to do them back-to-back; we want to build up and maintain a high temperature to get that material transfer.
Finally, The Crucial Cool-Down
You did it. The brakes are hot, and that transfer layer has been applied. But you're not done yet. This final step—letting everything cool down correctly—is just as important as the heating process.
Immediately after your last hard stop, accelerate to a steady cruising speed of 40-50 mph and just drive for at least 5 to 10 minutes. The most important rule here is to stay off the brakes entirely if you can. If you absolutely must slow down, use the lightest possible pressure.
This continuous drive allows a constant flow of air to pass over the rotors, cooling them down evenly and allowing that new friction layer to cure properly. Rushing this step is a recipe for warped rotors.
Once your cool-down drive is over, find a place to park. Put the car in park (or in gear for a manual) and use the parking brake, but try to avoid sitting with your foot on the brake pedal. Let the brakes sit and cool down to the ambient air temperature for about an hour. And that’s it—your new brakes are now properly bedded in and ready for the streets of Haltom City.
Common Bedding-In Mistakes and How to Avoid Them
You've done the hard part and followed the bedding-in steps, but a single wrong move can undo all that good work. It's frustrating, but it happens. Knowing the common pitfalls is just as important as knowing the procedure itself, especially with the stop-and-go traffic we see around Haltom City.
The great thing is, these errors are easy to sidestep once you know what to look for. Let's walk through the most common mistakes we see so you can get the smooth, quiet braking you expect.
The Problem With Coming to a Complete Stop
This is the big one. Seriously, if you remember nothing else, remember this. During the bedding-in cycles, your brake rotors get incredibly hot—hot enough to melt a microscopic layer of the brake pad material. If you come to a dead stop and keep your foot on the brake, you're essentially branding the rotor.
That hot pad will weld a patch of friction material onto that one spot. This creates an uneven surface, a tiny high spot. From that point on, every time the rotor spins, the pad will hit that little deposit, causing a shudder or vibration you'll feel right through the steering wheel and brake pedal.
I can't tell you how many times we've heard from folks in Haltom City who did the procedure perfectly, only to get stuck at a red light on Denton Highway right in the middle of it. Plan your route to avoid stops. If you absolutely have to stop, shift into neutral and use your parking brake to keep the hot pads from touching the rotors.
Braking Too Hard Too Soon
Patience really is key here. While the process calls for firm braking, you can't just slam on the brakes right away. Your new pads are full of binding agents and resins that need heat to cure properly, but they need that heat introduced gradually.
Going for a full-on panic stop from the get-go can overwhelm the pads. This causes them to overheat and glaze over. A glazed pad develops a hard, glossy surface that can't create the friction needed to stop your car effectively. You end up with weak, mushy-feeling brakes, which is the exact opposite of what you were trying to achieve.
Skipping the Cool-Down Phase
After all that hard braking, it's so tempting to just park the car and call it a day. Don't do it. Skipping the cool-down drive is a surefire way to warp your rotors. Your brakes are at their absolute hottest, and they have to cool down slowly and evenly while the wheels are turning.
If you stop immediately, all that intense heat gets trapped. The metal in the rotors can cool unevenly, causing permanent warping. A warped rotor will give you a constant pulsing feeling every single time you hit the brakes.
If you've ever wondered why brand-new brakes sometimes start to shudder, these mistakes are almost always the culprit. According to federal motor vehicle safety standards, it can take around 200 methodical stops for pads to fully seat. Even tiny variations in that transfer layer—we're talking as small as 0.0001 inches—can create vibrations that turn into damaging hot spots, a factor in 40% of premature brake failures, as reported by MOTOR Magazine. You can get a deeper look into the science of why breaking in brakes is so important.
And if you've done everything right but are still feeling a shimmy or hearing a squeal, it might be time to look into other potential signs of a brake problem.
When to Trust the Haltom City Brake Pros
While bedding in your own brakes can be a satisfying job, sometimes the smartest move is handing the keys to a professional. Not everyone has the right stretch of empty road, the time, or the confidence to get it done right—and that’s completely okay. Your safety is always the top priority, especially for Haltom City drivers.
Even if you follow the bedding-in procedure to the letter, you might still run into trouble. If you’ve done the work and something still feels off, it’s a good sign that a deeper issue needs an expert eye. These aren't problems you want to put off.
Warning Signs After Bedding In
Once the brakes have cooled down, pay close attention. A perfectly bedded set of brakes should feel smooth, quiet, and responsive. If they don't, your car might be trying to tell you something.
Watch out for these red flags:
- Noise That Lingers: A little noise during the bedding process itself is one thing. But if you're still hearing persistent squealing, grinding, or clicking sounds afterward, it’s time for a professional inspection in Haltom City.
- A Spongy or Soft Pedal: Your brake pedal should feel firm. If it feels mushy, almost like stepping on a sponge, or if it sinks too close to the floor, you could have air in the brake lines or a problem with the hydraulic system.
- Vibrations That Won't Quit: The whole point of avoiding a full stop during bedding is to prevent pad material from imprinting on a hot rotor. If you still feel a shudder or vibration through the steering wheel or pedal when you brake, the rotors could be warped or there might be an installation issue.
Ignoring these symptoms is a gamble with your vehicle's safety. For drivers around Haltom City, Watauga, and North Richland Hills, this is exactly when a trusted local mechanic becomes your best friend.
At Express Lube & Car Care, our ASE-certified technicians have seen it all. We have the diagnostic tools and hands-on experience to figure out exactly what’s going on with your brakes. We’re the trusted pros for Haltom City, here to get it right the first time so you can drive with confidence.
Building Trust with Your Local Haltom City Shop
Deciding when to trust the Haltom City brake pros often comes down to reputation. Learning about effective reputation management for small businesses shows how the best shops build lasting customer trust, and that trust is everything.
A good shop is always transparent, taking the time to explain what’s wrong and what it will take to fix it. Our team, right here at 6211 Denton Hwy in Haltom City, takes a lot of pride in giving clear, honest advice. We only use premium parts to make sure every brake service is done to the highest standard.
If you're ever unsure about what’s involved or just want to be a more informed car owner, check out our guide on what a professional brake service includes on our blog.
Frequently Asked Questions About Brake Bedding in Haltom City
Even with the best instructions, you're bound to have a few questions. It’s completely normal, especially when you're talking about your brakes. After years of working on cars in Haltom City, I’ve heard just about every question there is. Here are my answers to the ones that come up most often.
What If I Can’t Find a Safe Place for the Bedding Procedure in Haltom City?
This is a big one, especially for folks driving in and around Haltom City. If you can’t find a deserted stretch of road or a big, empty parking lot, don't try to perform the procedure in regular traffic. It's just not safe.
Don't sweat it, though—there's a workaround. You'll just need to adjust your driving style for the first 100-200 miles around Haltom City. Brake gently and moderately. Do your best to avoid any sudden, hard stops. If you see a red light ahead, coast a little longer and brake easier. When you do stop, try to creep forward slowly instead of sitting still with your foot firmly on the brake—this helps prevent hot spots on the new rotors.
Do All New Brake Pads Really Need to Be Bedded In?
The short answer is yes, but the how can differ quite a bit. Every new set of pads benefits from a break-in period to mate them perfectly to the rotor surface.
- Standard, everyday pads: The kind you'd find on most daily drivers in Haltom City usually just need that gentle break-in driving we talked about above. No aggressive stops are necessary.
- Performance and track pads: These are a different animal. They absolutely must go through the aggressive heating and cooling cycles to work properly. Skipping this step means they'll never deliver the performance they were designed for.
Your best bet is always to check the manufacturer's recommendation or ask your Haltom City mechanic. When diving into specialized car care, it helps to understand the different services available across the wider automotive industry.
What Should My Brakes Feel Like After Bedding Them In Properly?
Once the brakes have had about an hour to cool down completely, you should notice a significant difference. The pedal should feel solid and firm under your foot—not mushy or spongy.
The best way I can describe it is a confident "bite." When you touch the pedal, the brakes should grab right away, giving you a strong, immediate response and total control on Haltom City roads.
Ultimately, the goal is smooth, quiet, and predictable braking every single time. Any of the old vibrations, shuddering, or squealing should be a thing of the past. If your brakes feel anything less than perfect, it’s a clear signal to get them looked at by a professional in Haltom City.
If you're still on the fence about how to break in new brake pads or would just rather have an expert in Haltom City handle it, Express Lube and Car Care is here to help. Our ASE-certified technicians will make sure your brake service is done right from the get-go, so you can drive the streets of Haltom City with total peace of mind. Schedule your service with us today at https://www.expresslubehaltom.com.