

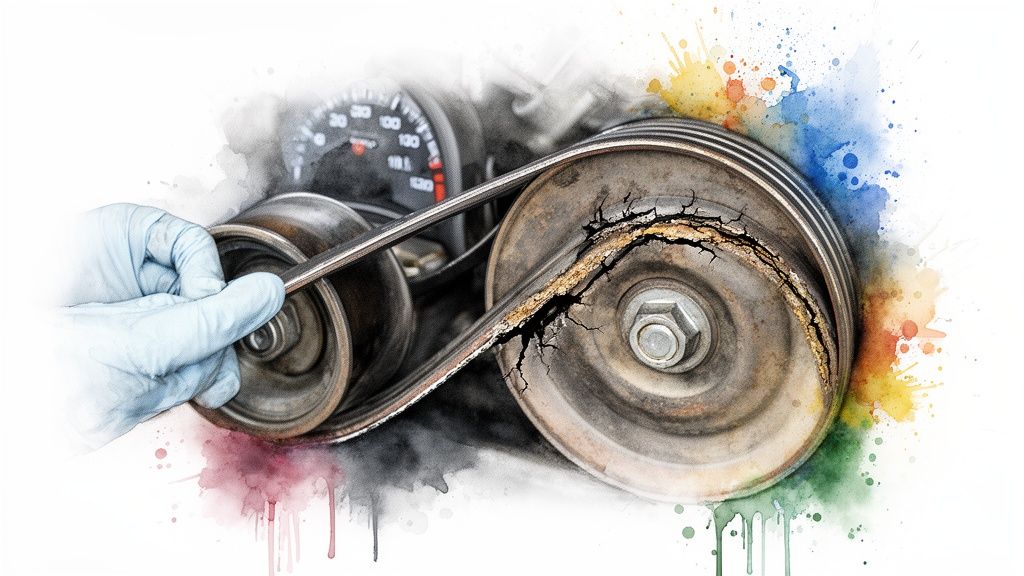
That awful, high-pitched squeal coming from under the hood isn't just an annoying noise—it's your car's way of screaming for help. More often than not, it’s a tell-tale sign that your fan belt replacement is overdue, a common issue for vehicles navigating the streets of Haltom City. This critical rubber band, also called a serpentine belt, is the workhorse that powers nearly everything your engine needs to run. Putting off a replacement can turn a simple fix into a costly breakdown, potentially leaving you stranded on Haltom Road or I-820.
Recognizing the Warning Signs of a Failing Belt
Think of the serpentine belt as the master coordinator for your engine's most important accessories. It drives the alternator, power steering pump, water pump, and A/C compressor. When it starts to give out, your car will throw a few warning signs your way before it completely snaps. That squeal you hear when pulling out of your Haltom City driveway is the most common cry for help, but it's not the only one.
Learning what to look and listen for is the key to preventing a total belt failure that leaves you stranded on Loop 820 or I-35W. It's about turning a potential roadside emergency into a routine maintenance job you can plan for with a local Haltom City mechanic.
Sounds and Performance Problems to Watch For
Your ears are one of the best tools you have. Beyond that classic squeal, you might hear a persistent chirping or even a ticking sound from the engine compartment. These noises often mean the belt isn't tracking correctly or the tensioner is on its way out. If you're hearing these kinds of sounds, it's worth checking out our guide on what to do when your car belt is making noise for other possible causes.
You should also pay attention to performance hiccups that might not seem related to a belt at first:
- Dimming or Flickering Lights: The belt spins your alternator to charge the battery. If the belt is slipping, it can’t provide consistent power, causing your headlights or dashboard lights to flicker.
- Stiff Steering Wheel: On cars with hydraulic power steering, the belt powers the pump. A failing belt can suddenly make turning the wheel feel like a serious arm workout.
- Engine Temperature Creeping Up: The water pump, which is essential for circulating coolant and keeping your engine from overheating, is driven by this belt. A slipping belt means a slow pump, and a hot engine isn't far behind—a major concern during a Haltom City summer.
What to Look For in a Visual Inspection
Sometimes, the best clues are the ones you can see with your own eyes. Just pop the hood (with the engine off and cool, of course!), grab a flashlight, and look for these red flags on the belt itself.
- Cracks and Fraying: Look for multiple cracks, especially deep ones that run along the belt's ribbed surface. This is a clear sign the rubber is old and brittle.
- Glazing or Shininess: A belt that looks shiny or glossy has hardened from heat and age. It's lost its grip and is likely slipping on the pulleys.
- Contamination: Any oil or coolant leaking onto the belt is bad news. These fluids will soften the rubber, causing it to slip, degrade, and fail much faster.
It's no surprise that these belts are a huge part of the auto maintenance world. The global automotive belts market was valued at $21.29 billion in 2026 and is expected to climb to $29.54 billion by 2034. It's a testament to just how universal and essential these components are for every car on the road in Haltom City and beyond. You can see the full breakdown of these automotive belt market trends on Fortune Business Insights.
Key Takeaway: A failing fan belt does more than just make noise. It can directly compromise your vehicle's cooling, charging, and steering systems. Learning to spot these different symptoms is the best way to prevent a breakdown.
Assembling Your Toolkit for the Job
Walking into a fan belt replacement without the right tools is a recipe for a bad afternoon. Trust me, trying to make do with whatever is in your basic home toolkit often ends in stripped bolts, busted knuckles, and more than one trip to a Haltom City auto parts store. This isn't just about having wrenches; it's about having the right wrenches and a few specialty items.
Think of it this way: you can't muscle your way through this job. The tension on a modern serpentine belt is incredibly high by design. Trying to release it with a standard, short-handled ratchet is a frustrating, and frankly, unsafe exercise.
The Essential Tool Checklist
For the vast majority of vehicles you see around Haltom City, from workhorse Ford F-150s to daily-driver Honda Accords, your shopping list is pretty straightforward. Here’s what I make sure I have within arm’s reach before I start.
Serpentine Belt Tool: This is the one tool you absolutely cannot skip. It's basically a very long, thin breaker bar that comes with a set of low-profile sockets and crowfoot attachments. That extra length gives you the leverage needed to safely move the spring-loaded tensioner, something a standard ratchet just can't handle.
Correct Socket or Wrench Set: Before you buy anything, peek at your car's tensioner. Most have either a square hole (for a 3/8" or 1/2" drive) or a bolt head that needs a socket. Having a handful of common metric sockets—especially 13mm, 14mm, and 15mm—will cover you for most tensioners and any bolts holding brackets in place.
Flashlight or Headlamp: Engine bays are notoriously dark places filled with shadows. A good light source is non-negotiable for seeing exactly how the belt is routed and making sure the new one is perfectly seated in every pulley groove. A headlamp is even better because it keeps your hands free.
Your Smartphone's Camera: This is the best free tool you have. Before you loosen a single thing, take a few clear photos of the belt's path from different angles. This five-second step has saved me more times than I can count and is the single best way to avoid routing the new belt incorrectly.
Finding the Right Replacement Belt
Having the perfect set of tools won't do you any good if you've got the wrong belt. Grabbing a belt that "looks about right" is a classic DIY mistake that will bring the whole project to a grinding halt.
Don't ever guess on the belt. A new belt that’s even half an inch too long will slip and squeal, while one that’s half an inch too short will be impossible to install without damaging something.
First, know what you're working with. Most cars built after the early 90s have a single, wide serpentine belt that runs everything. Much older, classic cars might have two or three separate V-belts. They are not interchangeable.
The easiest way to get the right part is to find the number printed on the old belt itself. If it’s too greasy or worn to read, just give a Haltom City auto parts store your car's year, make, model, and engine size. They'll look up the exact belt you need, ensuring the job gets done right the first time.
Your Practical Guide to Replacing a Serpentine Belt
Alright, let's get our hands dirty. Replacing a fan belt, or serpentine belt as it's more commonly known, can feel like a big job. But honestly, with a bit of patience and a clear game plan, it's something most Haltom City residents can tackle in their own driveway. This guide is all about the real-world steps to get it done right, minus the confusing shop talk.
First things first: safety. Before you even think about picking up a wrench, park the car on level ground and set the parking brake firmly. The engine must be completely cool to the touch—a hot engine can cause nasty burns in an instant. It’s also a non-negotiable step to disconnect the negative battery terminal. This prevents any chance of the engine accidentally turning over while you're working.
Getting your ducks in a row before you start is the secret to a frustration-free repair. Make sure you have the right tool, the correct belt, and the exact part number for your vehicle.
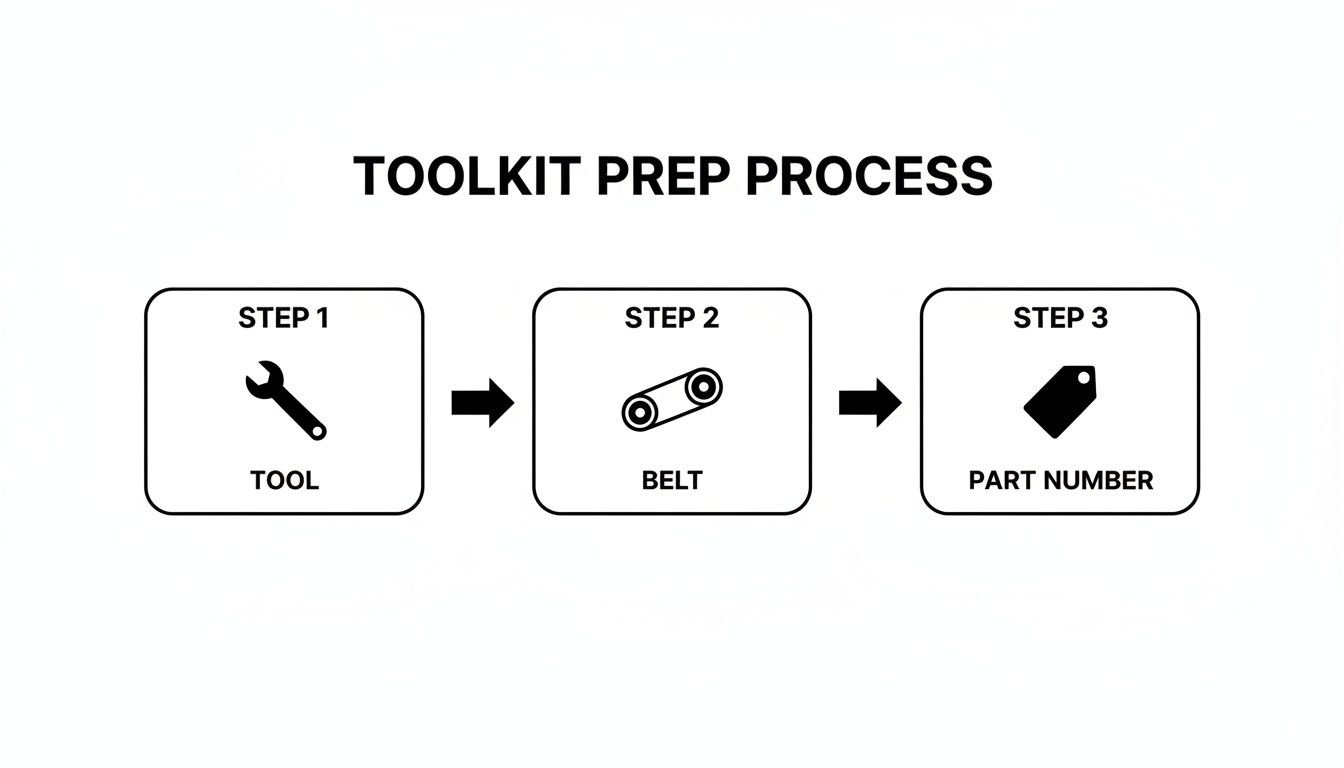
There's nothing worse than getting halfway through a job only to realize you have the wrong part. A little prep work here saves a massive headache later.
Mapping the Belt and Releasing Tension
Here's the single most important part of the entire process: you have to know exactly how the belt is routed. A modern serpentine belt winds its way around a whole series of pulleys in a very specific pattern. If you get it wrong on reassembly, some of your car’s accessories won’t work, and you could even cause serious damage.
Pro Tip: Before you touch anything, pull out your phone and take several clear pictures of the belt's path from a few different angles. Even better, sketch a quick diagram on a piece of cardboard. Trust me, this visual guide will be your best friend when it's time to put the new belt on.
With your map secured, it's time to release the belt's tension. Find the automatic belt tensioner—it's a spring-loaded pulley whose job is to keep the belt tight. You’ll need a serpentine belt tool or a long breaker bar to fit onto the bolt head or into the square slot on the tensioner’s arm.
- Move the Tensioner: Put your tool on the tensioner and apply slow, steady force. You'll see the arm pivot, which loosens the belt.
- Hold It Steady: It takes some muscle to hold it in place. Keep that pressure on the tool.
- Slip the Belt Off: While holding the tensioner back, use your free hand to slide the old belt off one of the smooth pulleys (not a grooved one). Once it's free, you can let the tensioner go and pull the old belt out completely.
With the old belt out of the way, take a minute for a quick inspection. Spin each of the pulleys by hand (all except the main crankshaft pulley at the bottom). They should all spin smoothly and silently. If you feel any grittiness, hear a grinding noise, or see a pulley wobble, that’s a red flag for a bad bearing. Don't ignore it—a bad pulley will chew up your brand-new belt in no time.
And just a quick note: while serpentine belts are a common DIY job, don't mix them up with their more complex cousin, the timing belt. You can learn more about the critical differences in our guide to timing belt replacement and its importance.
Installing the New Belt
Grab your new belt and your diagram or photos. I always find it easiest to start by looping the new belt around the crankshaft pulley at the very bottom, as it’s often the hardest one to get to.
From there, carefully thread the belt around each of the grooved pulleys. Pay close attention and make sure the V-shaped ribs on the belt seat perfectly into the grooves on each pulley. Keep looking back at your pictures to confirm you're on the right track. Try to save an easily accessible, smooth pulley for last.
Now, use your tool to pivot the tensioner again, creating the slack you need. With the tensioner held back, slide the last section of the belt over that final smooth pulley. Slowly and carefully release the pressure on the tool, allowing the tensioner's spring to press firmly against the new belt.
Don't close the hood just yet. Do one last, thorough visual check. Double-check that the belt is perfectly centered on every single pulley. Ensure the ribs are seated correctly in all the grooves. A belt that's off by even one groove can shred itself within minutes of starting the engine.
Once you’re 100% confident everything is lined up, reconnect the battery terminal. Start the engine and let it run for a minute. Listen for any squeals or odd sounds, and watch the belt to make sure it's tracking straight on the pulleys.
DIY Belt Replacement Checklist
Use this checklist to navigate the replacement process, ensuring you cover every critical step for a successful installation.
| Phase | Action Item | Pro Tip |
|---|---|---|
| Preparation | Park on a level surface, set the parking brake, and let the engine cool completely. | Safety first, always. Disconnecting the negative battery terminal is a must. |
| Mapping | Take multiple clear photos or draw a diagram of the belt's routing. | This is your single most important reference. Don't skip it. |
| Removal | Use a breaker bar or belt tool to release the tensioner and slip the old belt off a smooth pulley. | Applying slow, steady pressure is key to controlling the spring-loaded tensioner. |
| Inspection | Spin all accessible pulleys by hand (except the crankshaft). | Listen for noise and feel for roughness. A bad pulley will destroy a new belt. |
| Installation | Route the new belt according to your diagram, saving an easy-to-reach smooth pulley for last. | Make sure the belt's ribs are perfectly seated in every grooved pulley. |
| Tensioning | Use your tool to move the tensioner, slide the belt over the final pulley, and slowly release tension. | Never snap the tensioner back into place; a slow release is much safer for the components. |
| Final Check | Double-check that the belt is centered on all pulleys. Reconnect the battery. | Start the engine and watch the belt for a minute to ensure it runs true and quietly. |
Following these steps methodically turns a potentially complex job into a manageable one. Taking your time and being meticulous is the key to getting it right on the first try.
Troubleshooting Problems After Installation
Alright, you’ve put in the work. The new belt is on, you’ve tightened that last bolt, and you’re ready for the sweet, quiet sound of success. You turn the key, and… squeal!
Don't throw your wrench across the garage just yet. It’s a frustrating moment, for sure, but post-install problems happen more often than you'd think. A brand-new belt making noise usually isn't a sign of a bad part; it’s actually pointing you toward another issue the old, stretched-out belt was too loose to even notice.

Diagnosing a Squealing New Belt
When a new belt squeals, my mind immediately runs through three likely culprits: tension, alignment, or some kind of contamination. Before you start tearing things apart again, let's walk through the simple stuff first.
- Improper Tension: This is the big one, the number one cause of new-belt noise. If it’s too loose, it’ll slip and scream. Too tight, and you're putting a world of hurt on the bearings in your alternator, power steering pump, and other accessories. Here’s a quick shop trick: find the longest, straightest run of the belt between two pulleys. You should only be able to twist it about a quarter to a half turn with your fingers. Any more, and it's too loose.
- Pulley Misalignment: Get a flashlight and look straight down the belt's path. Does it run in a perfectly straight line from pulley to pulley? Even a tiny bit of misalignment will cause the edge of the belt to rub and make a high-pitched, persistent chirp.
- Fluid Contamination: It’s easy to do—a little coolant, oil, or power steering fluid drips onto a pulley while you’re working. That slick surface is all it takes to make a new belt squeal. Grab a clean rag, put a little brake cleaner on it (never spray it directly on the components!), and thoroughly wipe down the ribbed surface of each pulley.
What If the Belt Looks Wobbly or Unstable?
If you fire up the engine and see the belt vibrating wildly or looking like it’s about to jump track, shut it down immediately. This isn’t just noise; it’s a serious red flag.
A wobbling belt is often a loud warning sign from a failing component. The new, tighter belt is putting more force on the system, revealing a weakness that was previously hidden.
First, double-check your work. Is the belt sitting perfectly in every single groove on every pulley? It’s a classic mistake to be off by just one rib, and that’s all it takes to make the belt run crooked and unstable.
If the belt routing is perfect, the problem is almost certainly with one of the components. The new belt is simply revealing a pre-existing issue. I’d start looking for:
- A weak or completely failed belt tensioner
- A rough or seized idler pulley
- A bad bearing in the alternator, power steering pump, or water pump
Sometimes, a persistent squeal is actually a symptom of a heavy electrical load, which can point toward a struggling alternator. For a deeper dive on that, you might want to check out our article on how to know if your alternator is bad. If your troubleshooting leads you to a failing pulley or accessory, it might be time to bring in the pros here in Haltom City to prevent any further—and more expensive—damage.
DIY Repair vs Professional Service in Haltom City
So, your fan belt is shot. You're standing at a crossroads every car owner eventually faces: roll up your sleeves and tackle it yourself, or hand the keys to a pro? There’s no denying the satisfaction of a successful DIY repair. But with today’s engines, a job that looks simple on YouTube can quickly spiral into a weekend-long headache.
For drivers here in Haltom City, it often boils down to a classic debate of cost versus time and confidence. The DIY path looks cheaper at first glance—just buy the belt and you're good to go, right? But the real cost is more than just the part. Do you have a proper serpentine belt tool for leverage? What about a torque wrench to tighten everything back to factory specs? These specialty tools can add up fast, especially for a one-time job.
What a Pro Sees That You Might Miss
Beyond just having the right equipment, the biggest advantage of bringing your car to a shop in Haltom City is the expert diagnosis that comes with it. A trained technician’s eye is conditioned to see the entire system, not just the single worn-out part. They spot subtle clues an amateur would almost certainly miss.
While swapping out a belt, a professional might notice:
- A slight wobble in the water pump pulley, signaling a bearing that’s on its last legs.
- A tensioner that’s lost its spring, which will chew through your brand-new belt in no time.
- The tell-tale signs of an oil or coolant leak that caused the original belt to fail prematurely.
Finding these related problems during the initial repair is a game-changer. It stops a small issue from snowballing into a massive repair bill—and another breakdown—down the road.
The choice isn't just about who turns the wrench. It's about getting a comprehensive system check versus simply swapping a part. An expert diagnosis can prevent a future breakdown before it ever happens.
Weighing the True Cost
When you get a quote from a Haltom City shop, it's good to know how estimates work. If a mechanic finds a failing tensioner while replacing the belt, the initial price will naturally change. Having a good grasp on understanding potential changes in repair estimates helps you be a more informed customer.
Ultimately, the decision is a balancing act. A DIY job might save you $75 to $150 in labor costs, but that comes with a big catch: you’re entirely responsible if something goes wrong. A simple mistake like routing the belt incorrectly or overlooking a bad pulley can lead to catastrophic engine damage.
When you trust a Haltom City shop like Express Lube & Car Care, you’re buying more than just a repair. You're investing in:
- Guaranteed Expertise: Work is done right the first time by certified technicians using professional-grade tools.
- Parts & Labor Warranty: You're covered if the new belt or the installation has any issues.
- Time Savings: We can get the job done efficiently, getting you safely back on the roads of Haltom City.
Choosing a professional service gives you peace of mind that the work is solid and backed by a warranty. If you’re ready to see everything we can do for your vehicle, you can learn more about our expert auto services in Haltom City.
Even with a seemingly straightforward job like swapping out a fan belt, there are always questions. We get them all the time from folks here in Haltom City. Let's run through some of the most common ones we hear in the shop.
How Often Should I Replace My Belt?
The owner's manual for most cars will tell you to inspect the serpentine belt around 60,000 miles and probably replace it somewhere between 60,000 and 100,000 miles. But honestly, that's just a starting point.
Here in North Texas, our brutal summer heat is the real enemy. It cooks the rubber, making belts get brittle and crack way sooner than they would in a milder climate. That's why we tell our customers in Haltom City to have us give it a quick look every time they're in for an oil change. Catching a small crack early is much better than dealing with a snapped belt on the side of I-820.
Is a Fan Belt the Same as a Serpentine Belt?
You'll hear people use both terms, but they're not really the same thing. "Fan belt" is an old-school term from the days when cars had a whole collection of V-shaped belts, each running one thing—the fan, the alternator, etc. It was a messy setup.
Today, nearly every car, truck, and SUV you see in Haltom City uses a single, wide, flat belt with multiple ribs. This is the serpentine belt, and it does everything. It snakes around all the pulleys to power the alternator, water pump, air conditioning, and power steering. So, when someone with a modern car talks about a "fan belt," they almost certainly mean the serpentine belt.
Key Insight: While the names get mixed up, "serpentine belt" is what's on almost every modern engine. It's the single belt that keeps all your car's critical accessories running, and if it fails, your car stops running—period.
Why Is My New Belt Still Squeaking?
Ah, the dreaded post-replacement squeal. It’s one of the most frustrating things to deal with, but I can tell you it's almost never the new belt's fault. What's really happening is that the new, properly tensioned belt is putting a spotlight on another problem that was already there.
The squeal is a symptom, and we usually trace it back to one of these culprits:
- Bad Tension: A belt that’s too loose will slip and shriek. One that’s cranked down too tight will put a killer strain on the bearings of your accessories, leading to a different kind of expensive failure.
- Something Got on It: Even a tiny bit of leaked coolant, oil, or power steering fluid on a pulley can make a brand-new belt slip and scream.
- Failing Parts: The most common cause we see in our Haltom City shop is a worn-out tensioner or a bad pulley bearing. The new belt just makes the noise from the failing part more obvious.
If a new belt is making noise, your car is trying to tell you something. It needs a closer look from a Haltom City expert to find the real issue before it turns into a bigger, more expensive problem.
For a professional diagnosis and expert fan belt replacement here in Haltom City, you can count on the certified technicians at Express Lube and Car Care. We don't just slap on a new belt; we make sure the whole system is solid so you can drive with confidence. Schedule your service today by visiting us at https://www.expresslubehaltom.com.