

A quick check of your brake rotors can tell you a lot. It starts with a simple visual inspection—looking for obvious cracks, deep grooves, or any weird discoloration. Then, run your finger along the outer edge; if you feel a significant lip, that's a sign of wear. For a definitive answer, though, you'll need a micrometer to measure the rotor's thickness and make sure it's still above the minimum spec, which is usually stamped right on the rotor hub. This little process is key to catching problems before they put your safety on the line, especially on Haltom City roads.
Why Your Brake Rotors Are Critical for Haltom City Driving
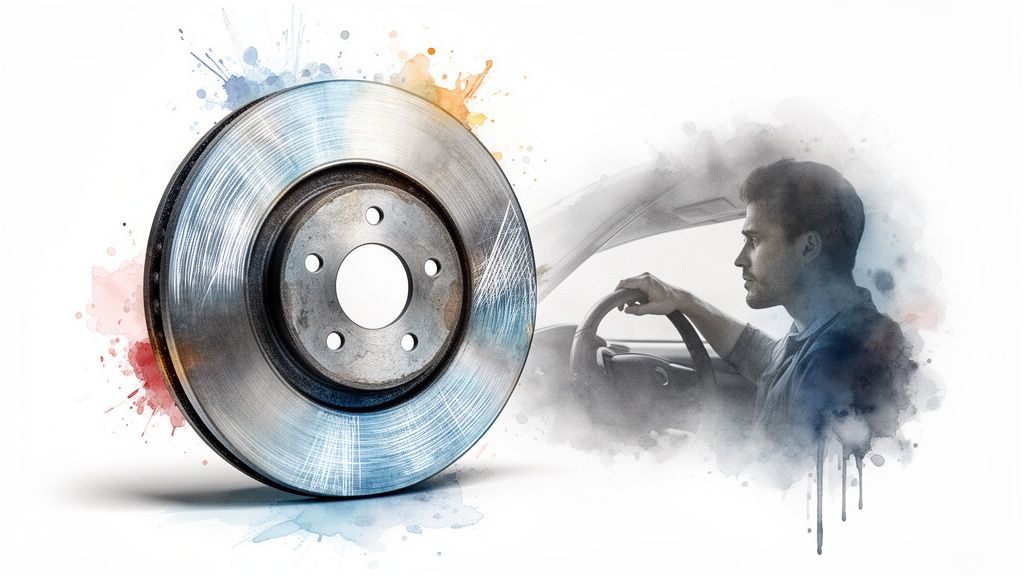
Whether you're dealing with the stop-and-go traffic on Denton Highway or just cruising through a Haltom City neighborhood, your brakes are easily the most important safety system on your car. But what most people don't realize is that the brake rotors—those heavy, circular discs tucked behind your wheels—are doing the real hard work. They provide the friction surface that your brake pads grab onto to slow you down.
Ideally, your brake rotors should be perfectly smooth and flat. That’s what gives you that consistent, quiet stopping power you rely on in Haltom City. But with every press of the pedal, a microscopic layer of metal gets worn away. After tens of thousands of miles, this wear and tear starts to add up, creating issues you can often feel and hear from the driver's seat.
Common Signs of Rotor Issues
Catching the early warning signs of rotor trouble can save you from a much bigger repair bill later on. If any of these symptoms sound familiar, it's a clear signal that your rotors need a closer look:
- Vibrations or Pulsating: Ever feel a shudder or pulse through the steering wheel or brake pedal when you slow down? That's a classic sign of uneven wear, often called "warping," on the rotor's surface.
- Grinding or Squealing Noises: While a high-pitched squeal can sometimes just be the brake pads, a deep, metallic grinding sound is a serious red flag. It almost always means your pads are completely gone, and now you've got metal grinding directly into your rotors.
- Longer Stopping Distances: If it feels like your car is taking longer to stop than it used to, don't ignore it. Worn or overheated rotors can’t create the friction needed to stop you effectively.
The bottom line is that brake health is non-negotiable for safety. According to the National Highway Traffic Safety Administration, a shocking 22% of all vehicle crashes can be traced back to brake system problems. Faulty rotors are a major player in that statistic. For anyone driving around Haltom City, this really drives home why knowing how to inspect your brake rotors is such a vital skill.
Getting a handle on what your rotors do is the first step. If you want to dive deeper, you might find our guide on the different types of car brakes helpful. This background knowledge builds the foundation for the hands-on inspection, giving you the confidence to either tackle the job yourself or know exactly what to tell a trusted Haltom City mechanic when you need professional help.
Your Toolkit for a Safe and Effective Rotor Inspection
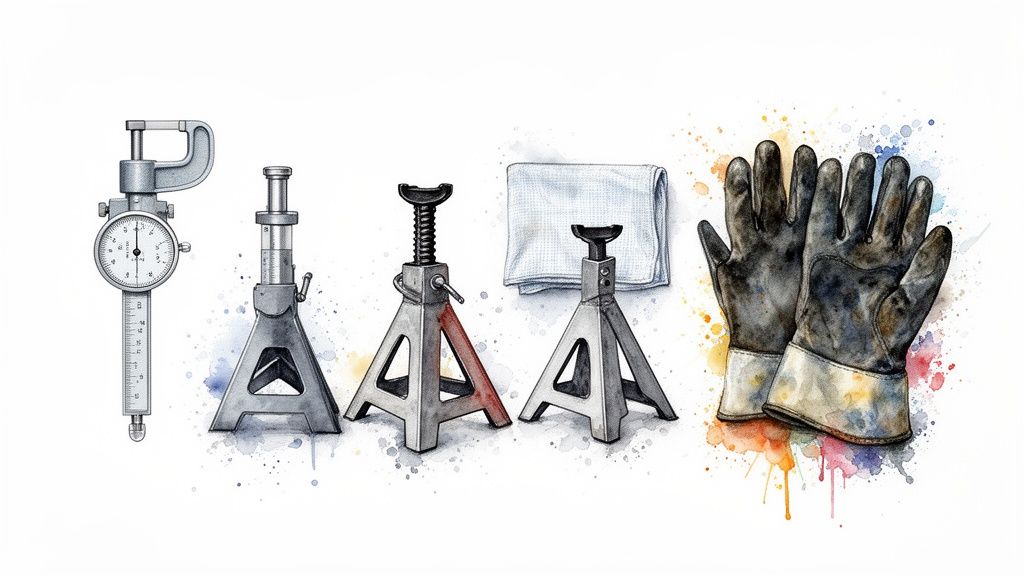
Before you can get a good look at your brake rotors, you need to get the car up and the wheels off. That means gathering the right gear and, most importantly, making safety your top priority. You can't do a proper inspection without the right equipment, and cutting corners on safety is a risk nobody should take.
First things first: find a flat, level surface to work on. A solid driveway or garage floor here in Haltom City is ideal. Once your car is parked and secure, it’s time to round up your tools. You don't need a professional-grade workshop, but a few key items are absolutely essential.
Essential Tools for the Job
Getting everything you need together beforehand makes the whole process go a lot smoother. No one in Haltom City wants to stop mid-job to hunt down a tool.
- Jack and Jack Stands: Your car's factory scissor jack is only for emergencies. A good hydraulic floor jack will lift the vehicle with ease, but the real MVPs are the jack stands—they are your most critical safety tool. Never, ever work under a car supported only by a jack.
- Lug Wrench: This one’s a no-brainer. You'll need it to loosen the lug nuts so you can pull the wheel and get to the rotor.
- Work Gloves and Safety Glasses: Simple but effective. Brakes are a dirty job, so gloves will keep the grime off your hands, and safety glasses protect your eyes from any flying rust or debris.
Precision Measurement Tools
A visual check can tell you a lot, but numbers don't lie. To really know the condition of your rotors, you have to measure them. Anything else is just guesswork.
The most important part of a rotor inspection is comparing its current thickness to the manufacturer's minimum specification. Look for a "MIN THK" number stamped right on the rotor hub—that's the absolute thinnest it can be before it’s considered unsafe.
The only way to get an accurate reading is with a digital micrometer or caliper. Taking a measurement and comparing it to that MIN THK spec is the definitive test. For the best results, hit the rotor surface with some brake cleaner and wipe it down with a rag first. This removes any dust or rust that could throw off your reading.
Taking these prep steps seriously is just as important as the inspection itself and is a crucial part of any good car inspection checklist.
A Visual Guide to Checking Your Brake Rotors
Once you’ve got the wheel off, the brake rotor is right there in plain view. This is where the real inspection starts, and you don’t need a wall full of tools to spot the most obvious signs of trouble. Your best initial tools are simply your eyes and your hands.
Start with the rotor's surface—that wide, flat face where the brake pad does its work. You’re looking for a smooth, consistent finish. If you think of a new rotor as a freshly paved Haltom City road, you're now searching for potholes, ruts, or anything else that isn't perfectly flat.
What to Look For on the Rotor Surface
What you see on the rotor tells you a lot about its history and current health. A little bit of wear is perfectly normal, but significant damage is a red flag that your stopping power is being compromised.
Deep Grooves (Scoring): Gently run your fingernail from the inside of the rotor surface to the outside edge. If your nail gets snagged in deep lines, like the grooves on an old vinyl record, you're feeling what mechanics call scoring. This usually happens when grit gets caught between the pad and rotor, or worse, when the brake pads have worn down to their metal backing plate.
Heat Cracks: Take a close look for tiny, spiderweb-like cracks. These are a result of extreme heat from heavy braking. While very fine, hairline "crazing" can be acceptable, any crack that’s deep enough to catch your nail is a serious problem. That rotor is compromised and needs to be replaced immediately.
Reading the Signs: Color and Edge Wear
The rotor’s color can also give away its secrets, especially when it comes to heat. A healthy rotor should have a uniform, dull silver look across its entire surface.
Be on the lookout for dark blue or purplish spots. This "blueing" is a dead giveaway that the rotor has been severely overheated. Extreme heat can permanently alter the metal, making it brittle and much more likely to warp down the road.
Here’s a pro tip for Haltom City drivers: Don't forget the very outer edge of the rotor. Carefully feel the transition from where the pad makes contact to the outer rim. A prominent, raised lip there is a direct indicator of how much the rotor has worn down. A tiny lip is expected, but a large, sharp one means it's seen a lot of miles.
For drivers in Haltom City, we know that rotor overheating is a real issue. Blue discoloration means that rotor has seen temperatures over 1,100 degrees Fahrenheit. A lip buildup of more than 0.060 inches is a clear sign it's at the end of its life.
At Express Lube & Car Care in Haltom City, we actually have our certified team use infrared thermometers after a test drive to check for hot spots. We’re looking for any variance over 100 degrees across the rotor surface, as that’s what leads to warping and increases your risk on the road. For more details, you can dig into the latest industry standards and market trends for automotive brake rotors.
This quick visual and touch test gives you a surprisingly accurate snapshot of your rotor’s health. If you find deep scoring, noticeable cracks, any blueing, or a big lip on the edge, it’s a strong sign that the rotor needs a closer look, and likely, a replacement.
Before making a final call, it’s always best to get precise measurements to confirm what your eyes are telling you. Now, let’s talk about how to do that.
Brake Rotor Visual Inspection Checklist
Use this quick reference table to identify common brake rotor issues and understand what they mean for your vehicle in Haltom City.
| Symptom | What It Looks Like | What It Means | Recommended Action |
|---|---|---|---|
| Scoring | Deep, concentric grooves on the rotor face. | Caused by debris or worn pads grinding into the metal. | Minor scoring may be machined; deep grooves require replacement. |
| Blueing | Blue or purple patches on the surface. | The rotor has been severely overheated, weakening the metal. | Immediate replacement is necessary; check calipers for sticking. |
| Heat Cracks | Small, spiderweb-like cracks on the surface. | Caused by extreme heating and cooling cycles. | Hairline cracks can be normal; deep cracks require replacement. |
| Heavy Rust | Flaky, deep rust on the friction surface. | Often from a vehicle sitting for a long time or high moisture. | Light surface rust is normal; deep pitting requires replacement. |
| Prominent Lip | A raised edge on the outer rim of the rotor. | Indicates significant material has worn away from the surface. | Compare to the minimum thickness spec; likely needs replacement. |
| Warping | Not always visible, but felt as a pulsation in the pedal. | Uneven thickness caused by heat and improper torque. | Measure runout; replacement is almost always the solution. |
This checklist is your first line of defense. Spotting these issues early helps you address problems before they turn into bigger, more expensive repairs.
How to Measure Rotor Thickness and Runout
While a good look and a quick touch can tell you a lot, they can't tell you everything. The most critical part of any brake rotor inspection comes down to the hard numbers. Your eyes can't see if a rotor has worn dangerously thin or if it's warped just enough to cause that annoying vibration. For that, you need to break out the precision tools.
This is where we go from a simple check-up to a real diagnosis. By measuring the rotor's thickness and its "runout," you get the full picture. These two numbers will tell you definitively whether your rotors are still good to go or if it's time for a replacement.
This flowchart gives you a great overview of the whole inspection process, from spotting grooves and cracks to checking for discoloration.
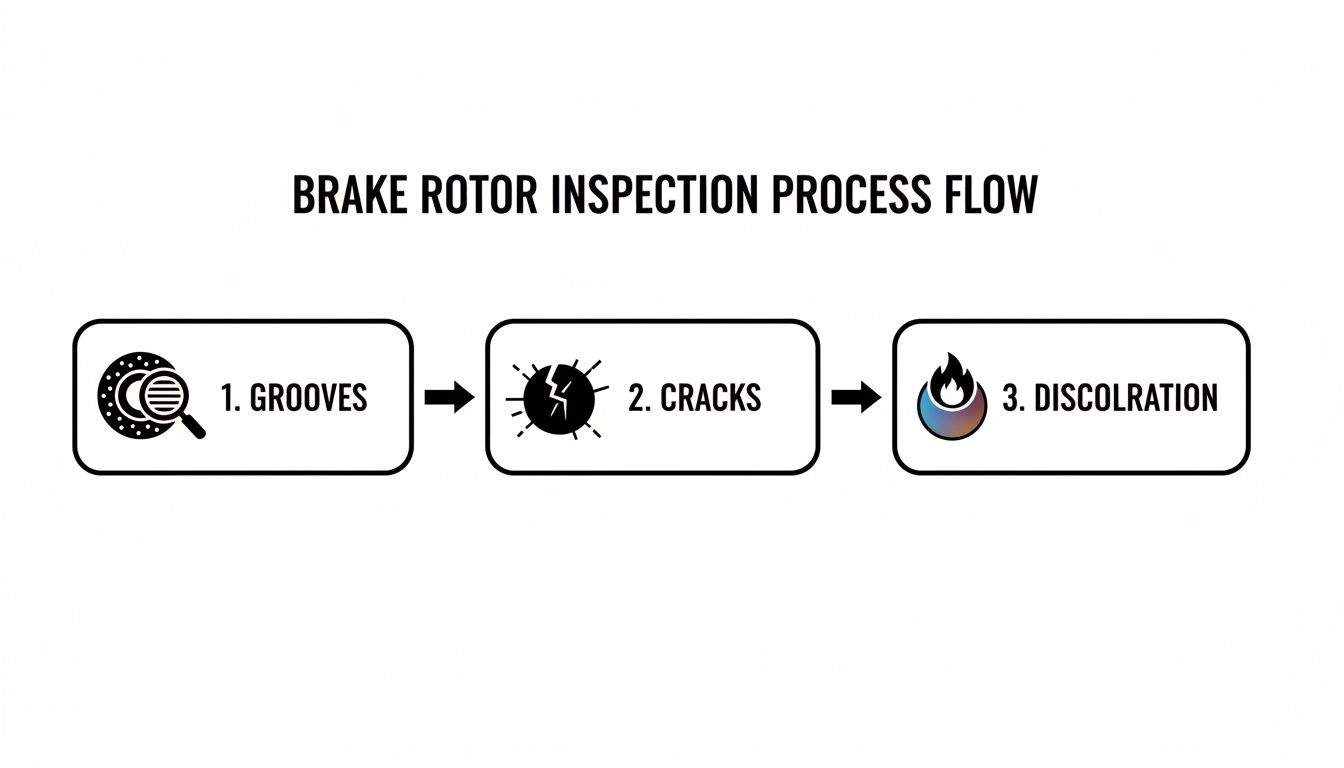
Following these steps ensures you don’t miss any of the tell-tale signs of wear, catching both obvious and hidden problems before they can put you at risk on Haltom City roads.
Measuring Rotor Thickness Correctly
Let's start with the most important measurement: rotor thickness. Every single brake rotor is manufactured with a minimum safe thickness specification. You can usually find it stamped right on the rotor's hub, labeled "MIN THK" followed by a measurement in millimeters. Once a rotor wears down past this number, it can't handle heat properly anymore, which dramatically increases the risk of it cracking or failing when you need it most.
To get an accurate reading, you’ll need a digital micrometer or a caliper. Don't just measure in one spot, either. You want to take readings from several points around the rotor to account for any uneven wear.
Here’s the right way to do it:
- First, hit the rotor with some brake cleaner to get rid of any grime or rust that could throw off your measurement.
- Open the jaws of your tool and place it over the friction surface where the brake pad makes contact.
- Gently tighten it down until it makes firm, even contact with both sides of the rotor.
- Note the reading and repeat this process in at least three other spots around the rotor.
If even one of those measurements is at or below the MIN THK spec, that rotor is done. It's not a suggestion; it's a non-negotiable safety standard. The rotor needs to be replaced. To understand everything that goes into that job, check out our guide on what a full brake service includes.
Checking for Lateral Runout
Ever feel a pulse or a shudder through the brake pedal, especially when slowing down from highway speeds in Haltom City? That's a classic symptom of lateral runout, which is just the technical term for a warped rotor. Even a tiny variation in the rotor's flatness—something completely invisible to the naked eye—can cause a noticeable pulsation as the high spots grab the pads harder than the low spots.
To measure runout, you need a dial indicator, usually one with a magnetic base. You'll attach the base to a solid, stationary part of the suspension, like the steering knuckle or strut. Then, you position the indicator's plunger so it's touching the rotor's face and zero out the gauge.
Now, just turn the rotor slowly and smoothly by hand for one complete circle. Keep your eye on the needle. The total distance the needle sweeps from its lowest to its highest point is your runout measurement.
Ever feel that steering wheel shake coming down Denton Highway? That’s probably runout. In our Haltom City shop, we find that any measurement over 0.005 inches is enough to cause a problem. Using precise digital micrometers, we can measure down to 0.001 inches, which helps us catch subtle issues like a stuck caliper piston that’s causing one side of the rotor to wear down faster than the other.
When to See a Haltom City Brake Specialist
Knowing how to inspect brake rotors is a fantastic skill for any car owner. It puts you in the driver's seat when it comes to your vehicle's maintenance. But the single most important part of any DIY project is knowing when to put the tools down and call a professional.
While a basic visual and tactile inspection is pretty straightforward, some findings are immediate red flags. These aren't suggestions; they're signals that it's time for an expert.
If your measurements show a rotor is below its minimum thickness (MIN THK), it's non-negotiable—that rotor is done. The same goes for any visible cracks, no matter how small, or runout that’s way out of spec. These are serious safety hazards that require specialized equipment and a seasoned pro to handle correctly.
For drivers around Haltom City, turning to a certified technician isn't throwing in the towel. It’s the smartest, safest decision you can make for yourself and everyone else on the road.
Why Professional Expertise Matters
A real professional brake service is so much more than just swapping out old parts for new ones. A good Haltom City technician has the experience to see the whole picture and diagnose the root cause of the problem.
For example, that severely grooved rotor might not be the actual problem. It could just be a symptom of a sticking brake caliper or a hydraulic issue in the master cylinder. If you just slap on a new rotor without fixing the real culprit, you'll be right back where you started in a few thousand miles with another ruined part. Pros have the diagnostic tools to hunt down these related issues and make sure the fix is complete and correct.
A professional brake job isn't just about the parts; it's about investing in a complete system service. This includes a full diagnosis, high-quality components, precision installation, and the peace of mind that comes with accountability.
Finding a Trusted Local Mechanic
When you need a professional, you want someone local you can count on. A little knowledge of how local SEO strategies for businesses work can give you a clue about which shops are invested in their community's trust. Always look for shops with consistently positive reviews from other Haltom City drivers and technicians with ASE certifications.
A professional shop can perform services a home mechanic can't, like precisely resurfacing a rotor (if it has enough material left) or replacing it with high-quality, vehicle-specific parts that guarantee smooth and quiet operation. They also handle crucial related jobs, like a full brake fluid flush, which is vital for the health of the entire system.
Don't let a major safety component become a weekend experiment. For true peace of mind, let a local Haltom City expert confirm your findings and get your car back on the road safely.
If your inspection has pointed you toward professional help, don't put it off. You can learn more about our services and grab a Haltom City brake service coupon to make the repair a little easier on your wallet.
Your Brake Rotor Questions Answered
Even with the best guide in hand, you’re bound to have questions when you’re learning how to inspect brake rotors. That's perfectly normal. To help you feel more confident, we’ve put together answers to the most common questions we hear from Haltom City drivers tackling this for the first time.
Should I Always Replace Brake Rotors in Pairs?
Absolutely. This is one of the golden rules of brake work. You must always replace rotors in pairs on the same axle—meaning both fronts or both rears get swapped out together.
Think about it: a new rotor is perfectly flat and has its full thickness. The old one on the other side is worn down. If you only replace one, you create a dangerous imbalance. Your car will pull to one side when you brake, and the new parts will wear out incredibly fast. For safe, predictable stopping power in Haltom City, always do them as a set.
What’s the Difference Between Resurfacing and Replacing Rotors?
Resurfacing, sometimes called "turning," is where a mechanic shaves a very thin layer of metal off the rotor's surface using a special lathe. This smooths out minor imperfections and can be a good, budget-friendly fix for rotors with light scoring or surface rust.
But it’s not always an option. Replacement is the only choice when a rotor is already too thin, has deep grooves, visible cracks, or signs of severe overheating (like a blueish tint). A good Haltom City technician can measure your rotor's thickness and tell you if resurfacing is a safe and viable option.
The bottom line is this: resurfacing can save you money on minor issues, but only if the rotor has enough metal left to remain safely above the "MIN THK" (minimum thickness) spec stamped on it. Once it's too thin, replacement is your only safe move.
How Often Should I Be Inspecting My Brake Rotors?
A great habit to get into is giving your rotors a quick visual check every time you get your tires rotated, which is typically every 6,000 to 8,000 miles. This simple step helps you spot problems early before they turn into something serious.
At the very least, you should plan on a more thorough inspection once a year. Regular check-ups are truly the best way to prevent a small issue from becoming a dangerous and costly failure down the road in Haltom City.
What Actually Causes Brake Rotors to "Warp"?
"Warping" is a bit of a misleading term. What you’re actually feeling when your brake pedal pulsates is thickness variation across the rotor's surface. This almost always comes down to one thing: excessive heat. Aggressive driving, frequent hard stops, or towing a heavy load can all generate enough heat to cause this.
Another common culprit? Improperly tightened lug nuts. When a tire shop in Haltom City zaps on your lug nuts with an impact wrench without using a torque stick, they can apply uneven pressure. This stress can distort the rotor as it heats and cools during normal driving, leading to that frustrating vibration you feel in the pedal.
If your brake inspection has left you with more questions than answers, or if you've found something that needs an expert eye, don't guess. The certified technicians at Express Lube and Car Care are here to give Haltom City drivers the honest advice and professional brake service they deserve. Schedule your brake inspection today.