

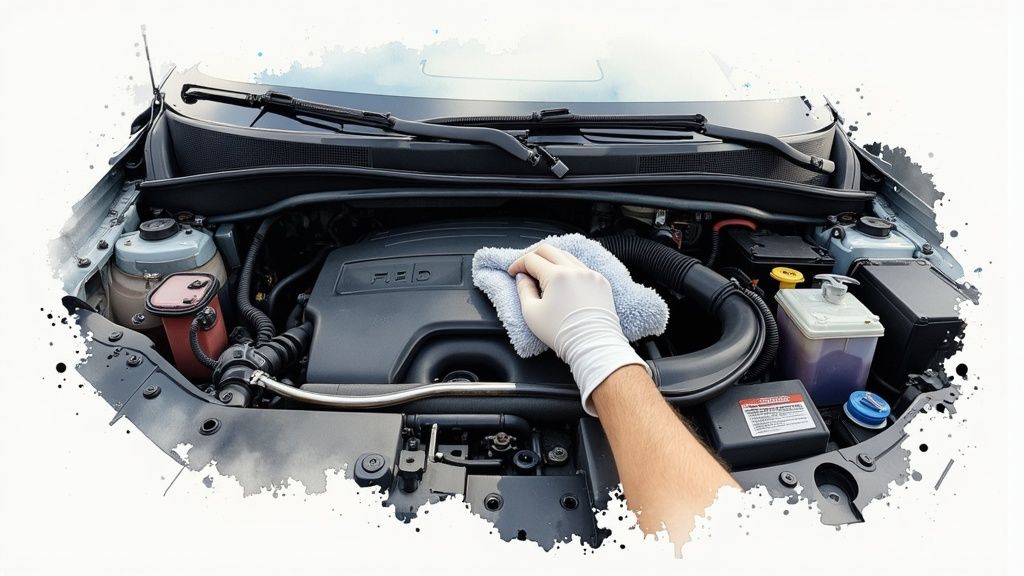
Learning how to get oil off your engine is about more than just grabbing a spray bottle and a rag. The right way involves using a quality automotive degreaser, a little elbow grease with some soft brushes, and a gentle, low-pressure rinse. This method gets rid of the gunk safely, without putting sensitive electronics at risk. Honestly, it's a basic skill every car owner can and should learn.
Why a Clean Engine Bay Is Your First Line of Defense
An engine bay caked in oil and grime isn't just ugly—it's a problem waiting to happen. Think of that thick layer of sludge as a winter coat for your engine, trapping heat and preventing it from cooling down efficiently. Over time, that extra heat can cook the rubber hoses, plastic connectors, and delicate wiring under your hood, leading to brittle parts and expensive failures down the road.
Even more importantly, a clean engine tells a story. It lets you or your mechanic spot trouble before it gets serious.
- Spot Leaks Early: A tiny oil drip from a valve cover gasket sticks out like a sore thumb on a clean engine. But if it’s hiding under a layer of dirt? You won't see it until it becomes a major leak, which can lead to low oil levels and catastrophic engine damage.
- Make Maintenance Easier: Simple jobs, like checking your fluids or swapping out spark plugs, are far less of a headache when you aren't wrestling with layers of grease and dirt.
- Boost Your Resale Value: Pop the hood for a potential buyer and show them a pristine engine bay. It screams "well-maintained" and can make a real difference in how much you get for your car.
The Impact on Performance and Longevity
Beyond just spotting leaks, keeping your engine clean directly affects its long-term health. When oil breaks down inside an engine, it can leave behind varnish and sludge that choke performance. In fact, this kind of buildup can cut an engine's performance by a staggering 20-30% over its life. Cleaning off that old oil residue is a simple way to help restore that lost efficiency.
A clean engine isn't just for show; it's preventative maintenance. It’s the cheapest diagnostic tool you own.
Keeping things tidy under the hood also helps ensure your vehicle is ready for an annual DOT inspection, since an inspector needs a clear view of all the components. Try to think of it less as a cleaning chore and more as a regular health checkup for your vehicle.
Choosing Your Degreaser and Assembling Your Toolkit
Walking into an auto parts store and seeing a wall of engine degreasers can be a little overwhelming. They all promise a sparkling clean engine, but the truth is, the right one for you really depends on the mess you're dealing with. Getting this choice right from the start makes the whole job a lot easier.
What Kind of Grime Are You Fighting?
Not all engine grime is the same. A light dusty film mixed with a fresh oil leak is a completely different beast than a decade's worth of baked-on, greasy sludge.
- Water-Based Degreasers: These are your go-to for light-duty cleaning. If you're just trying to wash away road dust and minor oil seepage, a water-based formula is perfect. They're gentler on plastic and rubber components and kinder to the environment.
- Citrus-Based Degreasers: A great middle-of-the-road option. These use natural solvents (like d-Limonene) that pack a good punch against moderate grease and oil buildup. They work well, smell better than the heavy-duty stuff, and are a bit less aggressive.
- Solvent-Based Degreasers: When you’re facing a thick, caked-on mess that looks like it’s been there since the car rolled off the assembly line, you need to bring in the big guns. Solvent-based formulas are incredibly powerful and will dissolve the toughest, most stubborn grime. Just be aware they are harsh, so careful application is key.
To help you decide, here’s a quick breakdown of what to look for on the shelf.
Engine Degreaser Comparison Guide
This table breaks down the most common types of engine degreasers to help you pick the right product for your specific cleaning needs.
| Degreaser Type | Best For | Pros | Cons |
|---|---|---|---|
| Water-Based | Light dust, fresh oil spots, regular maintenance. | Environmentally friendly, safe on most surfaces, easy to rinse. | May require more scrubbing for heavy grease. |
| Citrus-Based | Moderate grease, older oil stains, general-purpose cleaning. | Strong cleaning power, pleasant scent, less harsh than solvents. | Can be slightly more expensive. |
| Solvent-Based | Thick, baked-on sludge, heavy grease, neglected engines. | Extremely effective on tough grime, works quickly. | Harsh chemicals, strong fumes, can damage some plastics. |
Ultimately, picking the right degreaser comes down to honestly assessing how dirty your engine bay is. It's better to start with a less aggressive option and step up if needed.
Your Essential Cleaning Arsenal
Once you've chosen your weapon, it's time to gather the rest of your supplies. Trust me, having everything you need within arm's reach before you start saves a ton of frustration later.
- Personal Protective Equipment (PPE): This is non-negotiable. At a minimum, you need chemical-resistant gloves and a good pair of safety glasses. Degreaser splashing back into your eyes is a trip to the emergency room you don't want to make.
- A Variety of Brushes: You can't clean what you can't reach. A long-handled brush is a lifesaver for getting deep into the engine bay. You’ll also want a few smaller, stiffer brushes for scrubbing around complex parts and tight corners.
- Plastic Bags & Tape: Grab a roll of painter’s tape and some plastic grocery bags or plastic wrap. You'll need these to carefully cover up sensitive electronics before you start spraying.
- A Gentle Water Source: A regular garden hose with an adjustable spray nozzle is all you need. The goal is a gentle shower or mist, not a high-pressure blast that could force water into electrical connectors.
A word of advice from experience: don't even think about using household cleaners like dish soap. They aren't designed to break down automotive grease and can leave a weird, sticky film that just attracts more dirt down the road. Stick with a product actually made for the job.
As you get more comfortable working on your vehicle, you'll find that having the right tools makes every job easier. For other projects that have you reaching into tight spaces, a good versatile ratchet wrench kit is a fantastic addition to any home garage. Getting prepared now means you're ready for whatever your car throws at you.
Engine Prep: Protecting Your Vehicle from Costly Mistakes
Before a single drop of degreaser touches your engine, the most important work begins. This is the part of the job that separates a clean engine from a costly electrical nightmare. Rushing this stage is the number one reason people run into problems after a good wash, so take your time here. It's non-negotiable.
First things first: protect the sensitive electronics under the hood. Water and electricity are a famously bad combination, and your engine bay is packed with components that really don't like getting wet. Grab some plastic grocery bags or plastic wrap and a roll of painter's tape to start safeguarding these critical areas.
This visual guide shows the core elements of a safe and effective engine cleaning process.
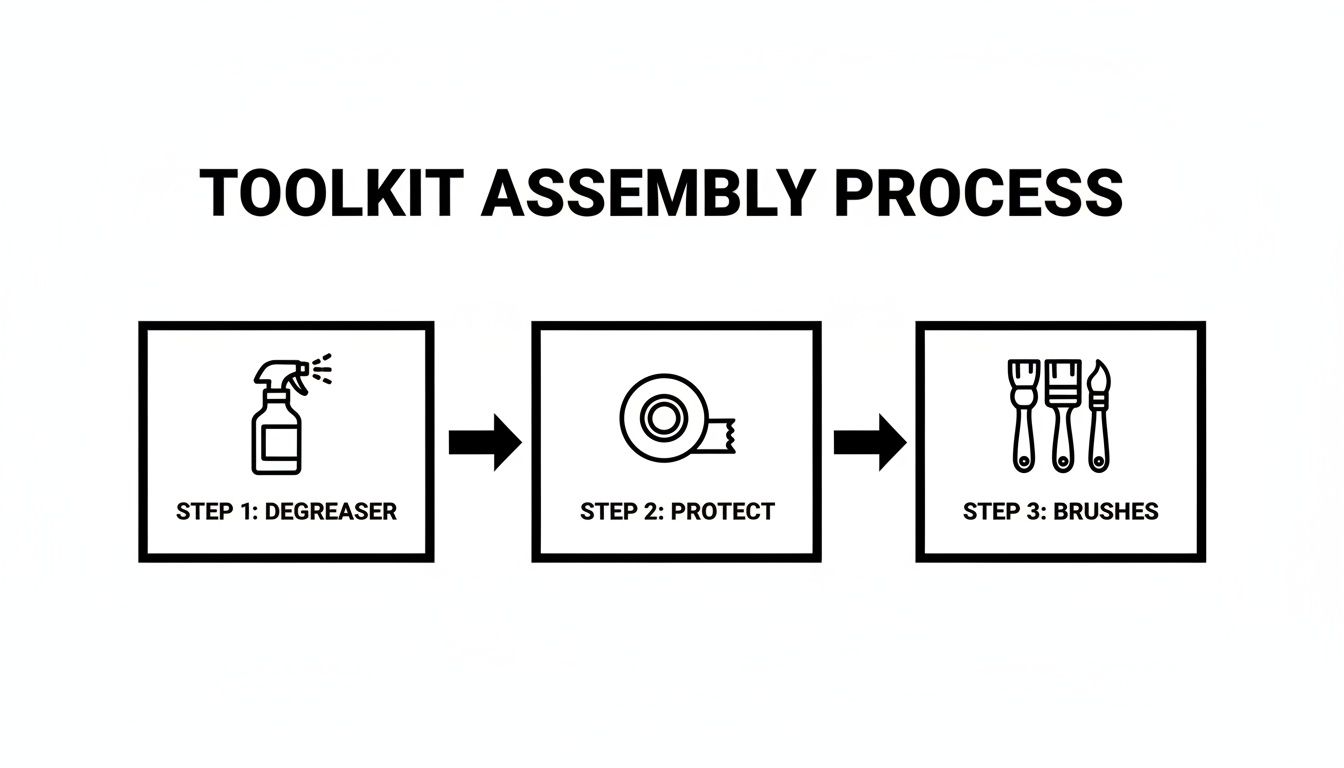
As you can see, protecting your engine's sensitive components is a foundational step, right alongside choosing your degreaser and getting your brushes ready.
What to Cover Before You Clean
You need to create a watertight seal around any vulnerable parts. Don't just drape a bag over them—use tape to secure the plastic tightly so no water can sneak in during the rinse.
Pay special attention to these components:
- The Alternator: This is extremely susceptible to water damage. Cover it completely and securely.
- Air Intake: Whether it’s a cold air intake or the stock airbox, seal the opening. The last thing you want is water getting into your engine.
- Fuse Box: Cover the lid. It might be weather-resistant, but a direct blast of water can force its way inside.
- Coil Packs and Spark Plug Wires: On many modern engines, these are right on top. Make sure they're well-covered to avoid misfires later on.
- Exposed Wiring Harnesses: Any visible electrical connectors should be wrapped up.
This step is absolutely vital. Even when you're using a low-pressure stream—I always recommend staying between 50-100 psi—you can still damage the 70% of sensitive components like wiring and sensors if they aren't protected.
The Warm vs. Cold Engine Debate
Next up is a question I get all the time: should the engine be warm or cold?
The answer is slightly warm, but never hot. If the engine is hot, your degreaser will evaporate almost instantly, leaving a chalky, splotchy mess. But a completely cold engine won't let the chemicals work as effectively on baked-on grime.
Run the engine for just a minute or two. You want it warm enough that you can feel it when you touch the valve cover, but not so hot that you can't comfortably keep your hand there. That little bit of heat makes a huge difference in how well the degreaser cuts through the grease.
Finally, take a quick look underneath your vehicle. If your car has a large plastic undertray or splash shield, it can trap all the oily residue and dirty water, preventing a truly thorough clean. Knowing the purpose of a front engine splash shield helps you understand that while it protects your engine from road debris, it can also hide the very gunk you're trying to rinse away.
With your engine properly protected and at the perfect temperature, you’re ready to get to the cleaning.
Applying Degreaser and Rinsing for a Flawless Finish
Now for the satisfying part. With all the sensitive bits of your engine protected, it's time to break down all that baked-on grime. A good degreaser does most of the hard work, but how you apply and agitate it makes all the difference between a decent job and a truly professional-looking result.
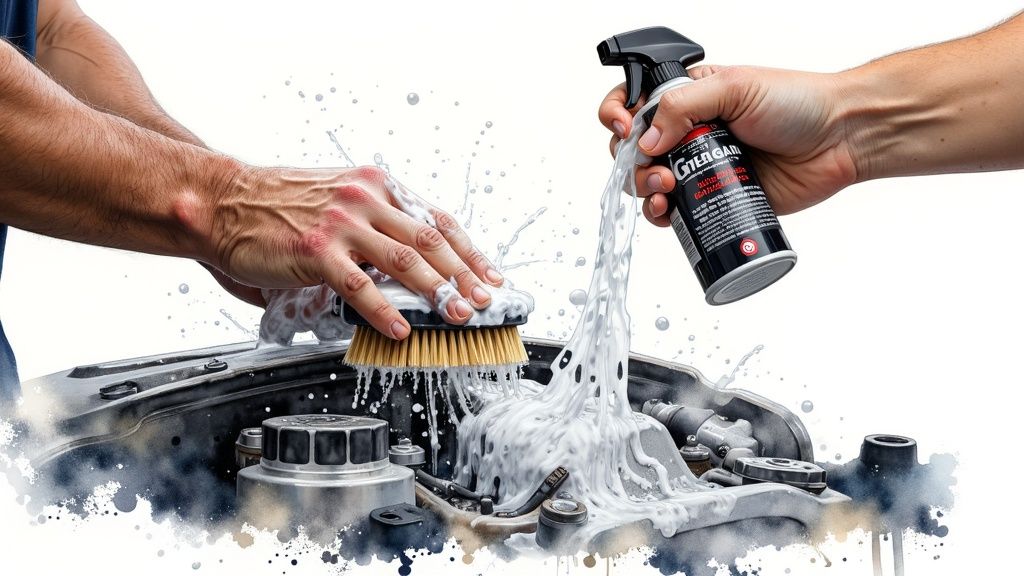
Here's a technique that pros use: always spray the degreaser from the bottom up. It might seem counterintuitive, but this prevents the cleaner from running down and creating streaks on the dry, dirty surfaces below. By working your way up, any drips fall onto an already-wet area, ensuring a much more even and consistent clean.
Agitation: The Secret to a Deep Clean
Don't just spray and rinse. Once you've coated the engine bay, let the degreaser sit for about 3-5 minutes. This "dwell time" is crucial for the chemicals to penetrate and break down the thickest layers of oil and gunk.
While it's soaking, grab your brushes and get to work. This is where you physically break the bond between the grime and the metal.
- Large, Soft Brush: Perfect for broad, easy-to-reach surfaces like the valve cover or intake manifold.
- Small, Stiff Brushes: Use these to get into all the nooks and crannies—around bolt heads, between cooling fins, and in tight corners where gunk loves to hide.
- Wheel Spoke Brushes: Their long, skinny profile is fantastic for reaching deep into the bay without scraping your knuckles.
Scrub every surface you can reach. You’ll see the degreaser foam up and turn a nasty brown color—that’s how you know it's working. This simple step is what separates a quick rinse-off from a deep, lasting clean.
Rinsing Away the Grime
When it's time to rinse, leave the pressure washer in the garage. A high-pressure blast is overkill and can easily force water past your protective coverings, potentially shorting out an electrical component. It can also bend the delicate fins on your radiator or even chip old paint.
A simple garden hose with an adjustable nozzle is all you need. Set it to a "shower" or "mist" setting to get plenty of water flow without the damaging force.
Pro Tip: Always rinse from the top down. Gravity is your friend here. Let the water carry all the dissolved grease and filth down and out of the engine bay. Keep rinsing until the water running off the bottom is perfectly clear.
If you’re experienced and have done meticulous prep work, a pressure washer can be used with extreme caution. For anyone considering this, a good guide to soap injectors for pressure washers can offer some valuable tips. And if you go this route, invest in quality gear like a non-marking hose with quick connects to avoid scuffing your paint.
Keeping the outside of your engine clean is more than just cosmetic; it's a window into its internal health. A clean engine makes it easy to spot new leaks. This is especially relevant when you consider that gasoline engines are expected to account for 55% of the global engine flush market by 2025. Why? Because frequent short trips often lead to sludge buildup that can reduce efficiency by up to 15%. A clean exterior helps you catch the external signs of these developing internal problems.
Finishing the Job: Drying and Protecting Your Engine
Getting all that baked-on oil and grime off is a great feeling, but don't close the hood just yet. The final steps—drying everything properly and adding a layer of protection—are what make your hard work last. More importantly, they ensure your vehicle starts right up without any electrical hiccups.
Rushing this part is a common mistake that can cause real problems.
Getting It Bone-Dry
Your number one priority now is to get rid of every last drop of water. Moisture is the natural enemy of your engine’s electrical system, so you have to be thorough.
- Forced Air is Your Best Friend: The most effective tool is compressed air or even a leaf blower. Use it to blast water out of every nook, cranny, and electrical connector.
- Microfiber Towels for Accessible Spots: A good microfiber towel is incredibly absorbent and perfect for wiping down easy-to-reach surfaces like the engine cover or valve covers.
- Let Nature Do the Work: If you don't have access to compressed air, you can simply let the engine air-dry. Just make sure it’s a warm, sunny day and give it a few hours. Patience is key here.
The Final Inspection and Protective Touches
Before you even think about turning that key, it's time to carefully remove all the plastic bags, wrap, and tape you put on earlier. This is also the perfect opportunity for a quick visual inspection. With the engine sparkling clean, you might finally spot the source of a pesky oil leak that was hidden under layers of gunk.
Pro Tip: Do one last, slow check on all the electrical connectors you covered. If you see even a hint of moisture, hit them with compressed air again. This single step prevents 99% of post-cleaning startup issues.
Once you’re confident that everything is completely dry, you can add a finishing touch. An engine dressing or protectant is a spray-on product that gives plastics and rubber that deep, satin finish they had from the factory.
This isn’t just for looks, though. These products condition the materials, helping to prevent them from drying out and cracking. As a bonus, they leave behind a slick surface that makes your next cleanup much easier because dirt and grime won't stick as easily.
This kind of proactive care is becoming more and more common. In fact, the market for products like engine flushes, which tackle internal oil deposits, is projected to reach $2.49 billion by 2030. This trend highlights how much drivers value keeping their engines clean, inside and out, to improve performance and extend their vehicle's life. You can discover more insights on engine cleaning market trends to see the bigger picture. Applying a protectant is a simple, smart step that aligns perfectly with that long-term maintenance mindset.
Answering Your Top Engine Cleaning Questions
Even with the best instructions, you're bound to have a few questions before you start hosing down your engine bay. That's totally normal. Let's walk through some of the most common things people worry about, so you can tackle this job with confidence.
How Often Should I Actually Clean My Engine?
This is probably the number one question I get asked. Honestly, there's no single magic number—it really boils down to how and where you drive.
- Most of us are daily commuters in the city. If that’s you, giving it a good cleaning once a year is probably all you need to keep things from getting out of hand.
- But if you're an off-road warrior or live down a long gravel road, you'll want to be more proactive. Think about cleaning it every 3-6 months to get rid of that caked-on mud and dust.
The best way to think about it is as part of your regular maintenance routine. A clean engine runs a bit cooler and makes spotting a new oil or coolant leak a hundred times easier.
Is It Okay to Use a Pressure Washer?
This is a big one, and the short answer is a very careful "yes, but…" A pressure washer can be your best friend or your worst enemy here. One wrong move and you can force water past seals, wreck sensitive electronics, or even bend the delicate fins on your radiator.
If you’re dead set on using one, you absolutely have to follow these rules:
- Always use the widest fan tip you have (usually the 40-degree one).
- Stay back! Keep the nozzle at least 18-24 inches away from any surface.
- Never, ever aim it directly at your alternator, fuse box, or any wiring harness, even if you’ve covered them.
Frankly, for most of us, a regular garden hose with a decent spray nozzle has more than enough power to do the job safely. It's the much safer bet.
Help! Why Won't My Car Start After Cleaning?
This is the nightmare scenario, right? You finish up, everything looks great, and then… nothing. Take a deep breath. 99% of the time, this is just a simple moisture issue.
Don't panic. Water has likely found its way into a spark plug well or a coil pack connector. The fix is usually just a matter of drying it out.
Grab a can of compressed air or even a leaf blower and methodically dry every connection you can see, especially around the ignition system. Unplug connectors, blow them out until they're completely dry, and click them back together firmly. If you can, let the car sit in the sun for an hour to help things evaporate. Nine times out of ten, this will solve it.
And one last tip: please don't reach for the dish soap. It's designed for bacon grease, not engine grime. It can leave behind a residue that actually attracts more dirt. Stick with a quality automotive degreaser—it’s made specifically for this job and will give you much better results.
If cleaning your engine reveals a bigger problem, like an oil leak you didn't know you had, don't ignore it. The certified technicians at Express Lube and Car Care are ready to take a look. We handle everything from quick diagnostics to major repairs, getting you back on the road safely. Stop by our Haltom City shop or check us out online for service you can count on.