

You’re busy. Your oil life monitor just hit 15%, and you need a fast, reliable oil change without the guesswork. This local oil change quick service guide is built for exactly that situation. Skipping or delaying an oil change is one of the most common ways drivers cause expensive engine damage, and oil changes cost anywhere from $20 to $55 depending on your vehicle and provider. What follows covers everything from preparation to post-service verification, so you get it done right the first time.
Table of Contents
- Key takeaways
- Tools and preparation for a quick oil change
- Step-by-step oil change process
- How to choose a trustworthy quick oil change service
- Post-service verification and staying on schedule
- Our take on speed vs. quality in oil changes
- Fast, reliable oil changes at Express Lube & Car Care
- FAQ
Key takeaways
| Point | Details |
|---|---|
| Prepare before you go | Know your vehicle’s oil type and quantity before visiting any shop or starting a DIY change. |
| Warm engine aids drainage | Running the engine briefly before draining helps oil flow out more completely and efficiently. |
| Verify after every service | Check oil level and inspect for leaks after every oil change, whether done yourself or by a shop. |
| Choose shops with inspections | Reliable providers perform multi-point inspections and explain every step they complete. |
| Track intervals consistently | Use your oil-life monitor or a mileage log to stay on schedule and avoid missed changes. |
Tools and preparation for a quick oil change
Getting to the shop or starting a DIY job without the right information wastes time and creates unnecessary stress. A little preparation up front makes the whole process faster and safer.
What you need to gather first
Your vehicle’s owner manual is the single most important resource you have. It tells you the exact oil type (such as 5W-30 or 0W-20), the total quantity needed, and the recommended change interval. Following manufacturer oil specs is the most reliable way to avoid problems at any service provider. If you’re visiting a shop, write down your oil type and quantity before you go. It takes 30 seconds and prevents you from being upsold into the wrong product.
For DIY drivers, here’s what you’ll need on hand:
- The correct motor oil (type and quantity per your owner manual)
- A new oil filter that matches your vehicle’s make, model, and year
- An oil filter wrench for removal
- A drain pan to catch used oil
- A funnel for clean refilling
- A torque wrench or socket wrench for the drain plug
- Nitrile gloves and safety glasses
- Clean rags or shop towels
Pro Tip: Check your oil change tips resource before starting. Knowing the correct torque spec for your drain plug prevents both leaks and stripped threads.
| Tool or Material | Purpose |
|---|---|
| Correct motor oil | Lubricates engine components per manufacturer spec |
| New oil filter | Removes contaminants from circulating oil |
| Oil filter wrench | Loosens stuck filters without damaging housing |
| Drain pan | Catches used oil during drainage |
| Funnel | Prevents spills when adding fresh oil |
| Torque wrench | Tightens drain plug to the correct specification |
| Nitrile gloves | Protects skin from hot oil and chemicals |
If you’re visiting a quick auto service shop instead of doing it yourself, the preparation is simpler. Have your vehicle identification number ready, confirm your oil type from the manual, and ask the advisor upfront what the service includes. A good shop will tell you without hesitation.
Step-by-step oil change process
A DIY oil and filter change typically takes around 30 minutes once you have your supplies ready. The steps below apply whether you’re doing it yourself or want to understand exactly what a shop should be doing on your vehicle.
Pro Tip: Warming the engine until the temperature gauge just begins to move before draining helps oil flow out more completely. Do not let the engine get fully hot, as that creates a burn risk.
- Park on a flat, stable surface. Engage the parking brake and let the engine warm up for two to three minutes, then shut it off.
- Locate the drain plug. It sits at the bottom of the oil pan under the vehicle. Place your drain pan directly beneath it.
- Remove the drain plug. Use a socket wrench and turn counterclockwise. Let all the old oil drain completely into the pan.
- Remove the old oil filter. Use your filter wrench and turn counterclockwise. Some oil will spill, so keep the drain pan nearby.
- Prepare the new filter. Dip your finger in fresh oil and lightly coat the rubber gasket on the new filter. This creates a proper seal and makes future removal easier.
- Install the new filter. Thread it on by hand until the gasket contacts the housing, then turn it an additional three-quarter turn. Do not overtighten.
- Reinstall the drain plug. Thread it back in by hand first, then tighten with a wrench to your vehicle’s torque specification (typically 20 to 30 ft-lbs, but always confirm in your manual).
- Add fresh oil. Open the oil filler cap on top of the engine, insert the funnel, and pour in the correct amount of oil.
- Run the engine briefly. Start the car and let it idle for 30 to 60 seconds. Watch for the oil pressure warning light to go off.
- Shut off and check. Turn off the engine, wait two minutes, then pull the dipstick. Wipe it clean, reinsert fully, pull again, and confirm the level sits between the min and max marks.
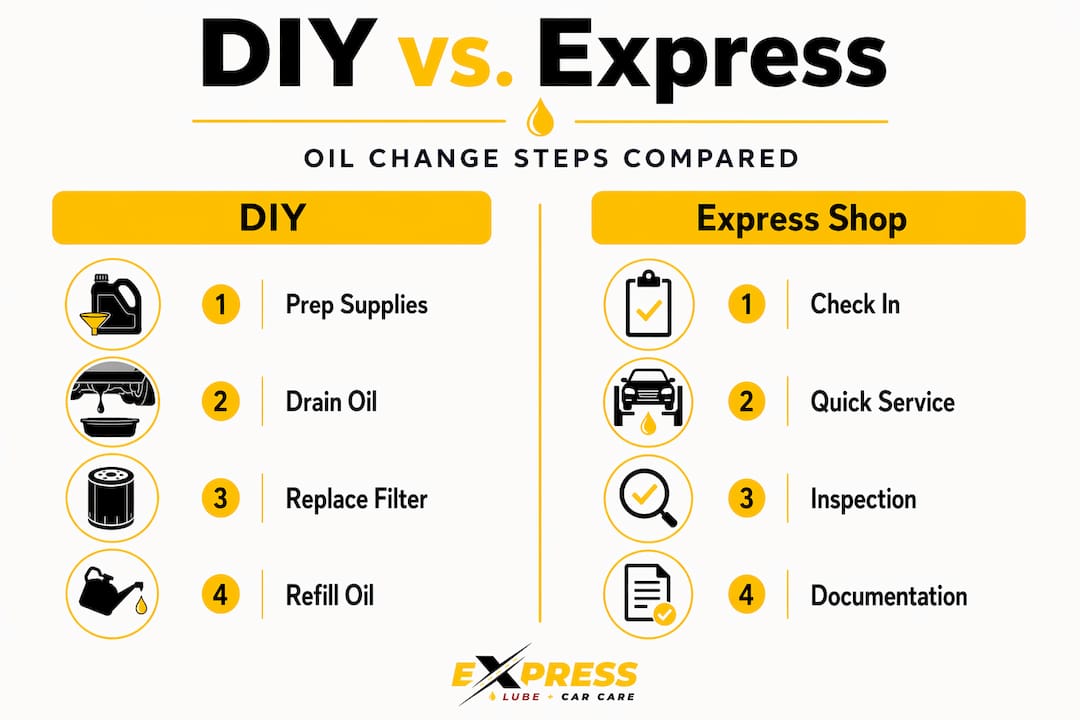
DIY vs. express oil change service: a quick comparison
| Step | DIY approach | Express oil change service |
|---|---|---|
| Preparation | You gather tools and supplies | Shop provides all materials |
| Time required | About 30 minutes | Typically 15 to 30 minutes |
| Cost | $20 to $55 for supplies | $20 to $55 for full service |
| Multi-point inspection | Your responsibility | Should be included automatically |
| Used oil disposal | Your responsibility | Handled by the shop |
| Skill required | Basic mechanical comfort | None required |
How to choose a trustworthy quick oil change service
Finding the best oil change near you is not just about price or proximity. Speed matters, but a fast service that skips steps or uses the wrong oil costs you far more in the long run.
Here’s what to look for when evaluating any local car maintenance provider:
- Transparent pricing upfront. A trustworthy shop gives you a written estimate before touching your vehicle. If pricing only appears after the work is done, that’s a problem.
- Correct oil type verification. The technician should confirm your vehicle’s oil spec before starting. If they don’t ask or check, ask them directly.
- Multi-point inspection included. Reliable providers follow inspection workflows that cover fluid levels, tire pressure, and visible wear items. This is not optional at a quality shop.
- Clear warranty or guarantee. A reputable auto repair shop explains what happens if something goes wrong after the service. Ask before you authorize the work.
- Responsible used oil disposal. Ask the shop how they handle used oil. Shops that follow proper disposal practices are more likely to follow proper service practices too.
- ASE-certified technicians. Certification matters. It means the person working on your vehicle has passed standardized competency tests, not just learned on the job.
Pro Tip: Check top mechanics in Fort Worth to see how certified providers are evaluated in the DFW area. The criteria there apply to any shop you’re considering.
One thing most drivers never think to ask: does the shop document what was done? A written service record protects you if a warranty claim ever comes up and helps you track your car maintenance schedule accurately over time.
Post-service verification and staying on schedule
The oil change is not finished when you drive away. A proper verification takes less than five minutes and can catch a problem before it becomes a serious one.
Follow these steps after every oil change, whether you did it yourself or had a shop do it:
- Check the dipstick while the engine is cold (at least two minutes after shutting off). The level should sit between the min and max marks.
- Look under the vehicle for any oil drips or wet spots near the drain plug or filter.
- Start the engine and watch the oil pressure warning light. It should go off within a few seconds.
- Check again under the car after the engine has run for a minute. A small drip that was not visible before may appear once pressure builds.
After refilling, restarting the engine and rechecking oil level is the most reliable way to confirm the service was done correctly. Skipping this step is how minor installation errors turn into engine damage.
Staying on your maintenance schedule
Your oil change interval depends on your driving conditions and your vehicle’s system. Ford’s oil-life monitor, for example, adjusts change timing based on real driving behavior, with a hard cap of one year or 10,000 miles regardless of monitor readings. Most modern vehicles have similar systems. Trust them, but also set a calendar reminder as a backup.
Between changes, keep an eye on these:
- Oil color on the dipstick (dark brown to black means it’s time; light amber means you’re fine)
- Any burning oil smell from the engine bay
- The oil level dropping between changes, which may indicate a slow leak or consumption issue
Disposing of used oil the right way
If you changed your own oil, you cannot pour it down a drain or into the trash. Used oil must be stored in a sealed, leak-proof container labeled “Used Oil” until you can bring it to an approved recycling center. Most auto parts stores accept used oil at no charge. For guidance specific to your area, the motor oil disposal guide from Express Lube & Car Care covers local requirements in detail.
Our take on speed vs. quality in oil changes
I’ve seen a lot of drivers walk away from a quick-lube visit thinking the job is done, only to find out weeks later that the filter wasn’t seated properly or the wrong oil viscosity was used. Speed is a real benefit when it’s backed by a methodical process. When it’s just about getting cars in and out, it’s a liability.
What I’ve learned after years of working with drivers in the DFW area is that the biggest mistake people make is treating an oil change as a commodity. They pick the cheapest option or the closest shop without asking a single question. Then they wonder why their engine is burning through oil faster than it should.
The drivers who get the most out of every service are the ones who show up knowing their oil type, ask what the inspection covers, and take two minutes to verify the work before they leave. That’s not paranoia. That’s being an informed customer.
Modern oil monitoring systems have made it easier than ever to avoid over-servicing or missing an interval. But no monitor tells you whether the technician used the right oil or torqued the drain plug correctly. That verification is still on you, and it takes less time than waiting for a drive-through coffee.
My honest advice: find one shop you trust, build a relationship with the service advisor, and stick with it. Chasing the lowest price every time costs more in the long run than paying a fair price consistently at a shop that does the job right.
— Express Lube & Car Care
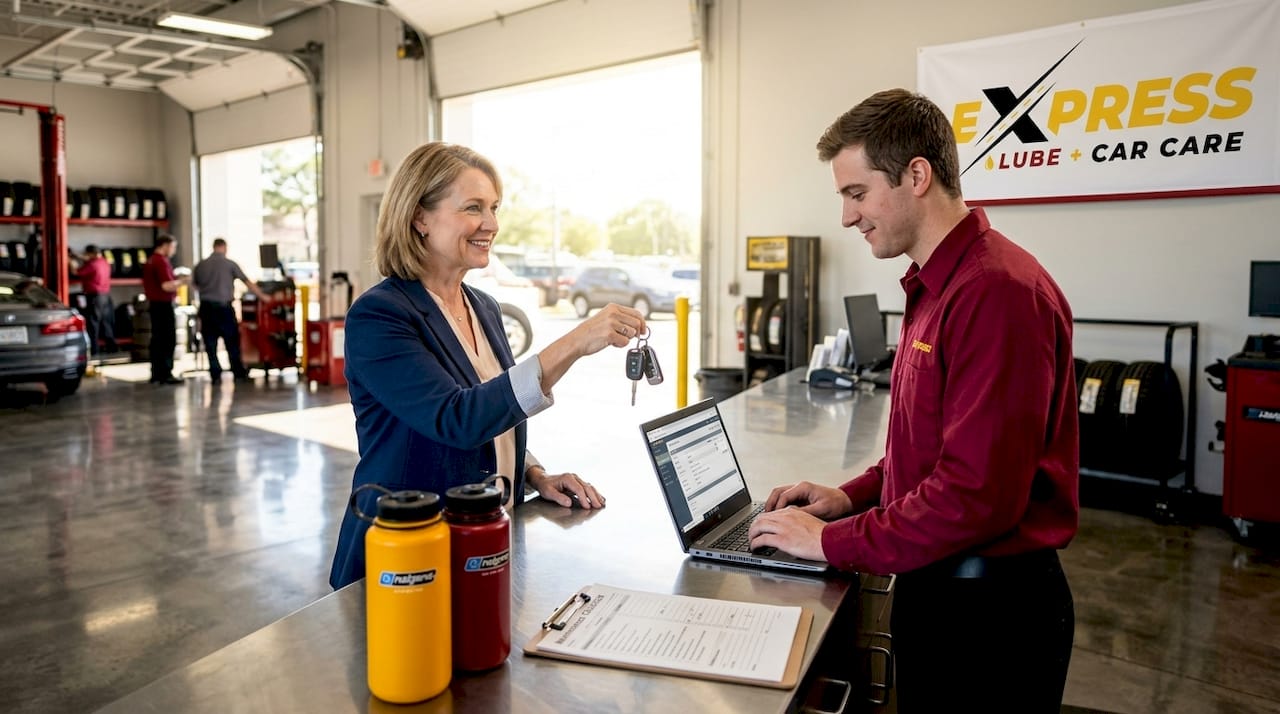
Fast, reliable oil changes at Express Lube & Car Care
When you need an oil change done right without rearranging your schedule, Express Lube & Car Care in Haltom City is ready for you. No appointment needed. ASE-certified technicians handle every service, and every visit includes a multi-point inspection so nothing gets missed. Pricing is transparent before any work begins, and the turnaround is fast enough to fit into a lunch break.
Whether you’re due for a routine oil change or want to follow up with engine diagnostics after a warning light, the team at Express Lube & Car Care has you covered. Stop in or schedule your next service today and get back on the road with confidence.
FAQ
How long does a quick oil change take?
Most express oil change services are completed in 15 to 30 minutes. A DIY oil and filter change also takes about 30 minutes once you have all supplies ready.
How often should I get an oil change?
Intervals vary by vehicle and driving conditions, but most modern oil-life monitors cap service intervals at one year or 10,000 miles. Always follow your owner manual’s recommendation first.
What should I check after getting an oil change?
Check the dipstick for proper oil level, inspect under the vehicle for leaks, and confirm the oil pressure warning light goes off within seconds of starting the engine. This post-change verification confirms the service was completed correctly.
How do I find a trustworthy local oil change shop?
Look for shops with ASE-certified technicians, transparent written pricing, and a multi-point inspection process. A reputable shop will also explain what was done and provide a written service record.
What do I do with used oil after a DIY change?
Store it in a sealed, labeled container and bring it to an approved recycling location. Used oil must not be poured down drains or placed in regular trash, as it poses serious environmental risks.