
Expect to pay roughly $150 to $580 for a thermostat replacement, with most jobs landing an average cost. Vehicle complexity, whether the thermostat comes sealed inside a housing, and labor time drive most of that spread. Before buying a part or booking a repair, get a proper diagnostic from a certified technician. Guessing at the cause of an overheating engine often costs more than the fix itself.
TL;DR:
- The average cost for thermostat replacement ranges from $150 to $580, mainly driven by labor complexity and access rather than part price.
- Sealed housing assemblies and buried thermostats increase costs significantly, sometimes reaching the upper end of the range due to extra disassembly needs.
- Symptoms like erratic temperature, slow warm-up, or rapid overheating often indicate a thermostat failure, but these issues can also stem from other cooling system problems.
- Proper diagnosis with diagnostic evidence and correct bleeding procedures are essential to prevent recurring overheating after replacement.
- DIY installation is feasible for parts cost below $80, but risks include improper gasket placement, trapped air, or cracked housings, especially in complex engine designs.
Table of Contents
- How Much Does It Cost To Replace A Thermostat?
- What Symptoms Point To A Failing Thermostat?
- Should You Replace A Thermostat Yourself?
- What Should A Thermostat Replacement Service Include?
- How Can You Lower The Cost Without Cutting Corners?
- What Safety Steps Matter During A DIY Thermostat Job?
- Our Take On Diagnosing And Repairing Thermostats
- Get Your Thermostat Checked Without The Guesswork
- Sources
- FAQ
How Much Does It Cost To Replace A Thermostat?
The cost of thermostat installation splits into two very different categories: the small part itself and the labor to reach it. A standalone thermostat valve can run as little as $20, but the average thermostat replacement price sits between $150 and $580, according to AutOwner’s repair cost data. Labor typically eats up a high proportion of that bill, not the part.
That labor share is the piece most drivers underestimate. On some engines, the thermostat sits right on top of the block, accessible in under an hour. On others, it hides beneath the intake manifold or inside a plastic housing bolted to the water pump, and reaching it means removing brackets, hoses, and sometimes an alternator. That difference in access is what separates a $180 repair from a $500 one, even when the actual part costs about the same.
Cost Insider’s breakdown puts parts in a parts cost range, with labor commonly running a labor time range. A mid-range vehicle typically lands between a mid-range total cost when both are combined. Here’s how that plays out by vehicle tier:
| Vehicle tier | Typical total cost | Average | Notes |
|---|---|---|---|
| Economy car | $150–$580 | an approximate average cost | Easy access, standalone valve common |
| Mid-range sedan/SUV | a mid-range cost range | an approximate mid-range average | Moderate labor time, some housing units |
| Truck/full-size SUV | a typical upper cost range | an approximate average | Larger cooling systems, more coolant volume |
| Luxury/buried engine | $150–$580 | a typical upper average | Sealed housings, tight engine bays |
Sealed housing assemblies explain most of the upper-end pricing. A a low-cost standalone valve replaces cleanly on its own, but many newer engines integrate the thermostat into a plastic housing that also manages sensor wiring and coolant routing. That housing alone can run $150 or more, and it’s often the only option once the original design fails. If your estimate comes back higher than you expected, ask whether you’re paying for a sealed housing or a simple valve. It changes the number a lot.
What Symptoms Point To A Failing Thermostat?
A thermostat rarely fails quietly. Watch for these signals:
- Erratic temperature gauge that climbs, drops, or bounces with no clear pattern
- Slow warm-up, where the engine takes far longer than normal to reach operating temperature (a sign it’s stuck open)
- Rapid overheating, especially under load or in stop-and-go traffic (a sign it’s stuck closed)
- Weak cabin heat, since a stuck-open thermostat keeps coolant too cool to warm the heater core properly
These are the classic markers J.D. Power lists for a failing thermostat, and they overlap heavily with other cooling system problems. That overlap is exactly why a scan tool code alone shouldn’t decide your repair. The OBD-II code P0128 simply means coolant temperature is staying below the thermostat’s regulating setpoint. It doesn’t confirm the thermostat itself is bad. Low coolant, a failing temperature sensor, or a circulation issue can trigger the same code.
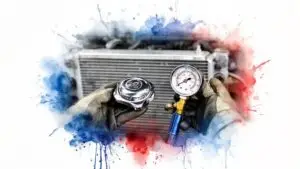
A methodical technician checks coolant level, tests the temperature sensor, runs a pressure test, and verifies the fan and water pump before ever touching the thermostat. That sequence rules out cheaper fixes first.
Pro Tip: Ask your shop for itemized diagnostic evidence, like photos or printed test results, before authorizing a thermostat replacement. A calm answer backed by real data beats a guess every time.
Should You Replace A Thermostat Yourself?
DIY thermostat installation cost usually runs $20 to $80 for parts: the thermostat, a new gasket, coolant, and basic hand tools you likely already own. A torque wrench is worth borrowing if you don’t have one, since over-tightening housing bolts is a common way to crack plastic components. PartCatalog’s DIY guide puts the job at a labor time range depending on engine layout, which roughly matches professional labor-time estimates.
Labor dominates a shop bill for a reason: access and disassembly drive the hours, not the swap itself. That’s a fair trade if your time is worth more than the labor savings, but it also means a DIY attempt carries real risk if something goes wrong partway through.
Before deciding, weigh these steps:
- Confirm your engine’s thermostat is accessible without removing major components like the intake manifold.
- Check whether your vehicle uses a standalone valve or a sealed housing assembly, since housings are less forgiving of DIY error.
- Verify you have a torque wrench and the correct bolt specs from your service manual.
- Plan for coolant disposal and a full bleed cycle, not just the swap.
The biggest DIY failure points are incorrect jiggle-pin alignment, trapped air pockets, and cracked housings from over-torqued bolts. Get any of those wrong and you can end up right back where you started, or worse. If your thermostat is buried, integrated into a complex housing, or you’re managing a fleet vehicle on a schedule, hiring a shop with the right tools and lift access is usually the smarter call.
What Should A Thermostat Replacement Service Include?
A proper thermostat replacement service follows a set sequence, not a shortcut version of it:
- Initial diagnostic to confirm the thermostat, not something else, is the actual problem
- Coolant drain and system inspection for contamination or debris
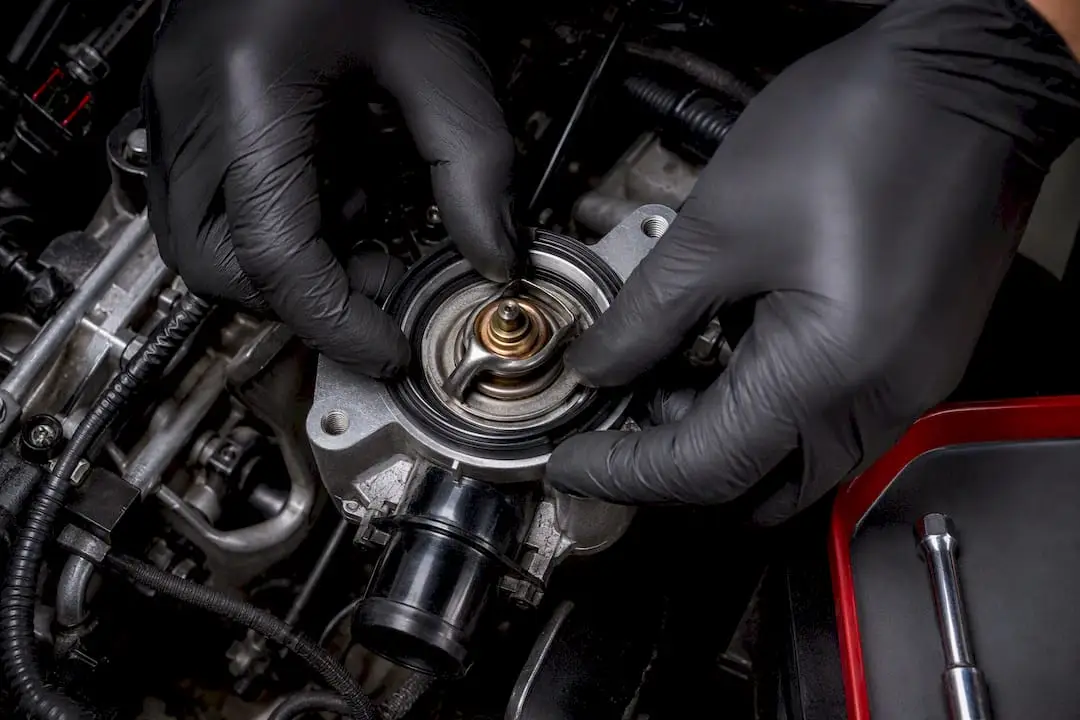
- Housing removal and thermostat and gasket replacement
- Bolts torqued to manufacturer spec, since over-tightening cracks housings
- Coolant refill and a full bleed cycle to purge trapped air
- Test drive to confirm stable operating temperature
Certain items commonly add to the total: a full coolant flush if the fluid is old or contaminated, housing replacement when the original is sealed and worn, or aging hoses and sensors discovered during the job. None of these are upsells if the parts genuinely need it, but you should see them itemized, not lumped into one number.
A correct repair shows up in how the car behaves afterward. Operating temperature should hold steady, the heater should work properly, there should be no leaks around the housing, and no new error codes should appear after a test drive. Proper bleeding matters more than most drivers realize here. Get it wrong and you can have a perfectly good new thermostat installed with the same overheating complaint still showing up days later.
How Can You Lower The Cost Without Cutting Corners?
A few habits keep your budget for a thermostat upgrade reasonable without risking a repeat repair:
- Ask for an itemized quote that separates parts, labor, and any sealed housing requirement upfront
- Choose quality OE or reputable aftermarket parts, since cheap thermostats are a common source of early failure
- Bundle related cooling system work, like a hose replacement or coolant flush, into the same visit to avoid paying for duplicate labor twice
- Watch for red flags after the repair: continued overheating, fluid leaks, a burning smell, or new dashboard codes
That last point matters more than any of the savings tips. If overheating persists after a replacement, don’t wait to see if it resolves on its own. Head back to the shop right away, since a stuck-closed thermostat left unaddressed can escalate into head-gasket damage or worse.
Pro Tip: If a shop suggests replacing the thermostat during other cooling system work, like a water pump or hose job, it’s often a smart move. You avoid paying for the same labor hours twice down the road.
What Safety Steps Matter During A DIY Thermostat Job?
A hot cooling system holds pressure and temperatures well above what skin can handle safely. Never open a radiator cap or loosen the thermostat housing on an engine that’s been running recently. Let it cool fully, ideally overnight, before starting any work.
Coolant itself deserves respect too. It’s toxic to pets and wildlife, so drain it into a sealed container rather than letting it pool on the ground, and dispose of it at a facility that accepts automotive fluids. Wear gloves when handling used coolant, since it can contain contaminants from engine wear.
Support the vehicle properly if you need to get underneath it. A jack alone isn’t stable enough. Use proper jack stands rated for your vehicle’s weight, and never work under a car supported only by a hydraulic jack.
Watch your torque specs closely when reinstalling the housing. Thermostat housings, especially plastic ones common on newer engines, crack easily under excessive force. A torque wrench isn’t optional here; it’s the difference between a clean repair and a cracked housing that leaks coolant days later.
Finally, double check thermostat orientation before closing everything up. The jiggle pin or bleed notch needs to sit at the highest point in the housing, typically the 12 o’clock position, to let trapped air escape during the bleed cycle. Get that wrong and you can end up with circulation problems even though the new part works perfectly.
Our Take On Diagnosing And Repairing Thermostats
Too many drivers treat a thermostat like a cheap, disposable part, and that mindset causes more repeat repairs than the part itself ever does. The real skill in this job isn’t swapping a $20 valve. It’s confirming that’s actually what’s wrong before anyone touches a wrench.
At Express Lube & Car Care, our ASE-certified technicians run digital vehicle inspections with photos so you can see the failing component yourself, not just take our word for it. We believe transparent, itemized diagnostics build the kind of trust that keeps drivers coming back, especially when the number on the invoice is higher than they hoped. Same-day service is often possible when the thermostat is easily accessible. Buried engines or sealed housing jobs sometimes need a longer booking window, and we’d rather tell you that upfront than rush a repair that needs to be done right.
Get Your Thermostat Checked Without The Guesswork
Skip the trial-and-error approach to a cooling system problem. Express Lube & Car Care gives Haltom City drivers a faster path to an answer than piecing together forum advice and hoping for the best, with ASE-certified technicians who diagnose before they quote.
Booking is simple: bring your make, model, mileage, and a description of what you’re noticing, whether that’s a climbing gauge, weak heat, or a recent overheating scare. If you’ve had coolant service recently, mention that too. It helps narrow down the cause faster. Our digital vehicle inspection process includes photos of the actual component in question, so you’re never approving work you can’t see for yourself.
If the repair bill runs higher than expected, especially on vehicles with sealed housings, flexible financing through Snap Finance can help spread out the cost. And while you’re in for a cooling system check, it’s a good time to grab our $25 off oil change coupon and knock out two maintenance items in one visit. Schedule your appointment today and get a straight answer on what’s really going on under the hood.
Sources
- Thermostat Replacement Cost: $150 – $580 (2026) | AutOwner
- Auto Thermostat Replacement Cost Guide 2026 – Cost Insider
- Symptoms of a bad or failing thermostat | J.D. Power
- Thermostat jiggle pin guidance | Gates TechZone
FAQ
Is Thermostat Replacement Expensive?
Not usually. Most repairs fall between $150 and $580, with labor making up a high proportion of that cost due to access and disassembly time.
Can I Replace A Thermostat Myself To Save Money?
Yes, if the thermostat is accessible and you have basic tools and a torque wrench. Parts typically cost $20 to $80, but incorrect orientation or over-torqued bolts can cause bigger problems than the original issue.
Why Did My Car Still Overheat After A New Thermostat?
Trapped air from an improper bleed cycle is a common cause. The jiggle pin or bleed notch needs to sit at the highest point in the housing during installation to let air escape properly.
Does A P0128 Code Always Mean I Need A New Thermostat?
No. That code only means coolant temperature is staying below the thermostat’s setpoint, which can also point to low coolant, a bad sensor, or a circulation problem.
How Long Does A Thermostat Replacement Take?
Most jobs take a labor time range depending on engine access. Simple, accessible thermostats can often be handled same-day, while buried or sealed-housing designs may need a longer scheduling window.